

Visibly Mending a Linen Shirt
While I mostly repair and visibly mend knitwear, I try to look after all the clothing I love including shirts.
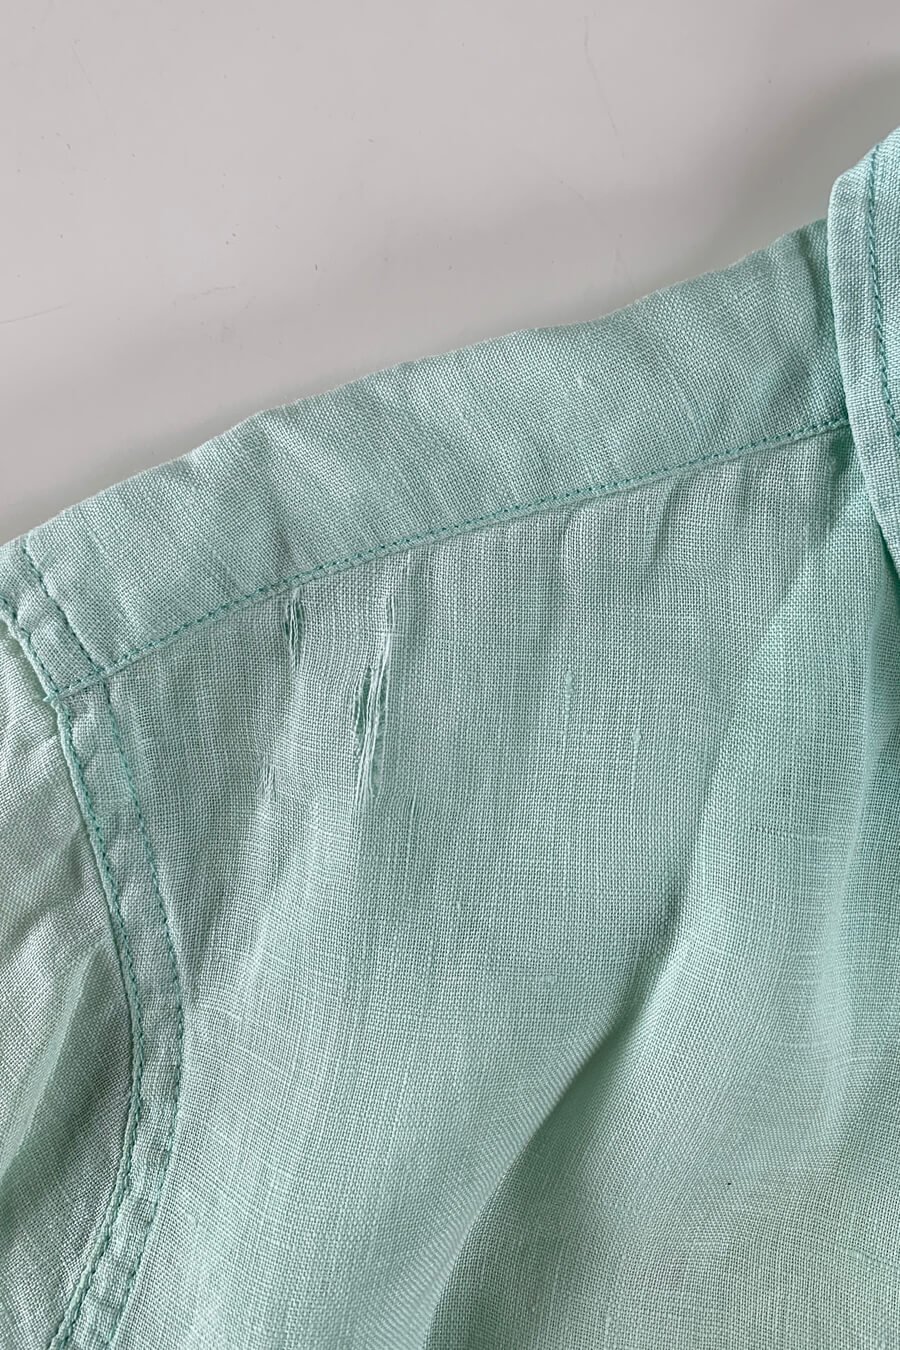
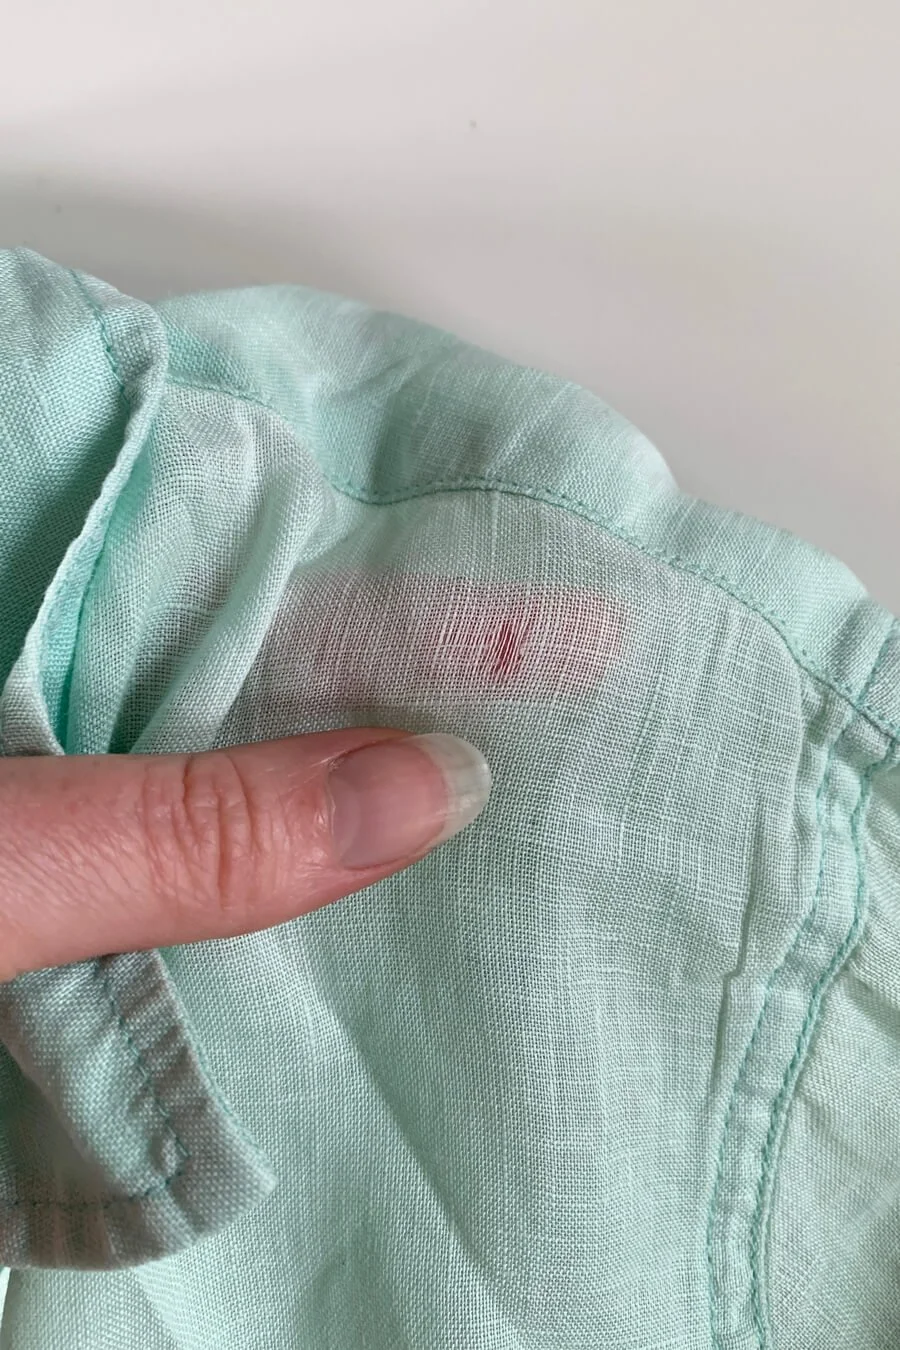
Recently I noticed a couple of holes on the shoulders on my favourite linen shirt. They’ve worn through with age (possibly helped by rucksack straps perhaps). There was also a small hole on one of the sleeves. Actually, once I noticed the holes, I noticed that the whole shirt is now very thin and will definitely need more attention in the near future.
In theory, if a garment is definitely going to need more repairs in the very near future, then I might argue that it’s not a good investment of time to repair it, and the fabric could be saved to repair other things. I really love this shirt though, so I decided to go for it – mending is after all a creative outlet for me, and I find it hugely relaxing and enjoyable.
Patching vs Darning
A few years ago I tried visibly mending a similar linen shirt by darning it, but it wasn’t especially successful as the whole shirt had become so thin. The darning itself was fine, but more holes appeared around it very quickly as the thin fabric ripped. It was also extremely time consuming as the fabric and darn were so fine. With that in mind I felt that patching my shirt would be more effective.
Here I’m defining patching as adding a fabric above or below the hole that will be stitched in place.
Darning can work well on woven fabrics, but it’s more suited to small rips or moth holes in linen than for threadbare garments. This goes for knitwear too.
How to Mend a Shirt
1. Assess the damage
1a. Find all the holes and weak spots to that need repairing

2. Cut out fabric for a patch in pin it in place.
I had some fine cotton lawn fabric, which is a similar weight to the linen, which wouldn’t make the patching too heavy or bulky. I decided that I would make the patches quite large- much larger than they needed to be to just repair the holes I had. This was to save having to visibly mend the shirt in the future and to also have more control over the design for that area.
I laid my fabric over the areas I wanted to cover and cut out my patches. I normally wouldn’t worry about the edges of the fabric fraying slightly as my patches were going to be on the inside of the garment and I would normally just leave them. However, as my patches were going to come to the edge of my shirt front, I included enough fabric to hem it slightly on those edges. I then pressed the edges I was going to turn in and pinned it in place. I realised that I’d pressed the edges the wrong way around and changed them, so the raw edges were trapped inside.
To keep the patching in place while I worked, I then tacked around the fabric to hold it. Tacking or basting is loose stitching or large running stitches that hold something in place- this stitching gets removed later, so it can be done in any spare thread you have.

3. Tack around the patch to hole the fabric in place.

4. Hand stitching through both layers of fabric with small running stitches.

5. Hand stitching across the holes- I wanted to make sure this area was very secure.
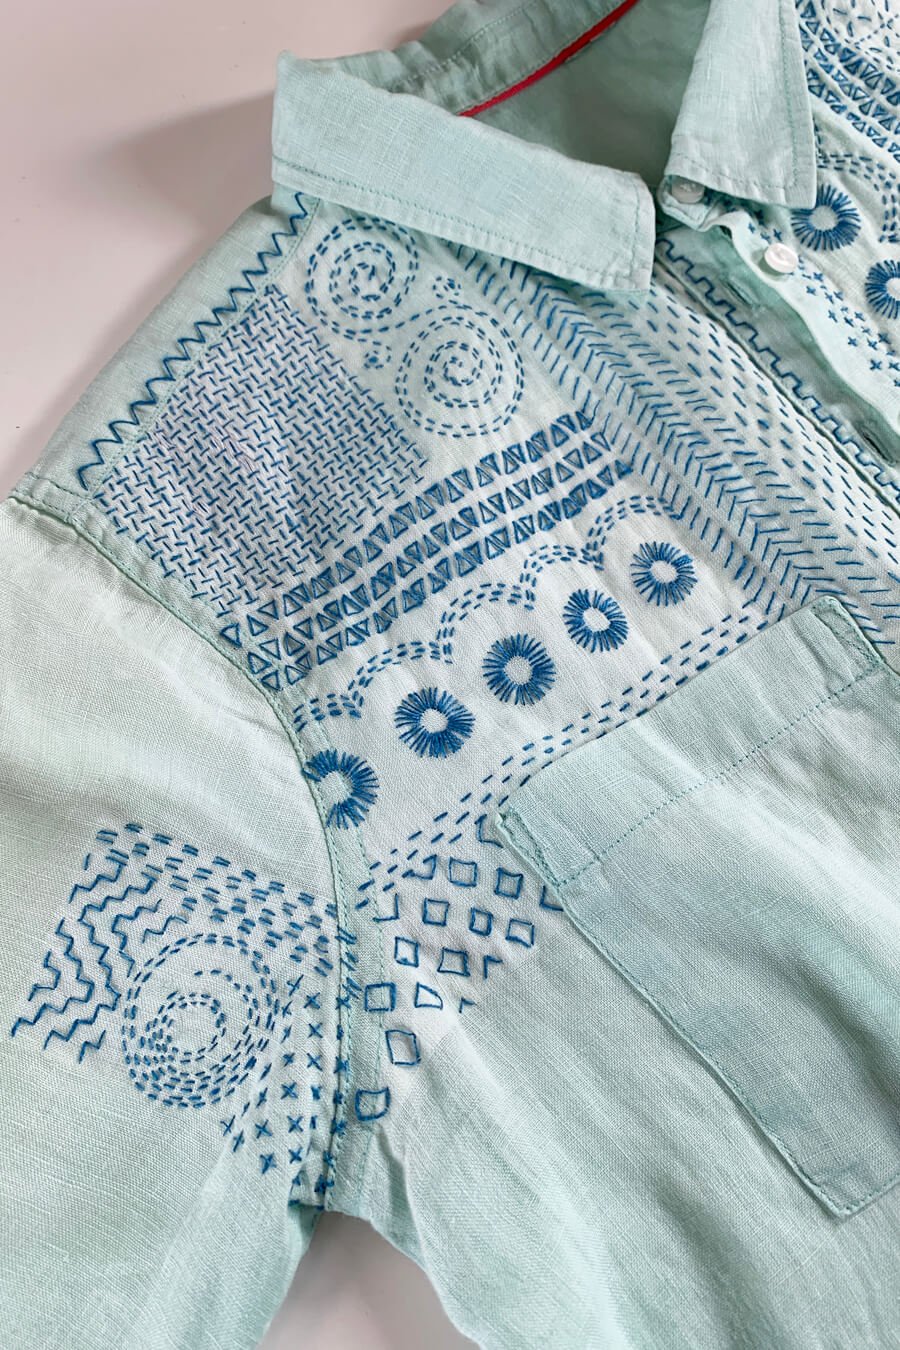
Sashiko inspired creative stitching
For this visible mending shirt repair I wanted to have a bit of fun, and make up the design as I went along.
I’ve always loved the look of sashiko repairs, but don’t like the idea of working on a transfer template, and rather like stitching that still retains the imperfections or personality that can come with hand stitching. Sashiko translates as “little stabs”, and so I’ve based my stitching on lots of small stitches making up different patterns.
I used fine linen thread from Studio Flax, which I’ve really enjoyed using, and keep the colour the same throughout, so the focus is on the stitching.
For one of the holes, I went for stitching that looks a bit like a woven pattern. I wanted to make sure that the two fabrics were well attached in that area.
On the other shoulder, I tried to create a pattern loosely based on some tiling I saw. I’ve always loved Greek patterns too, so some of my stitching is inspired by them.
Straight Stitch is one of my favourite stitches to use when incorporating embroidery into my repairs. It’s very simple, and can be used to create all sorts of designs. This is what I’ve used for the circles on this shirt.
My new creative patching and darning for jeans and shirts live zoom workshop is an ideal opportunity to set time aside to learn to some simple stitches you can use to creatively mend your clothes!

This is very simple sashiko stitching, with little running stitches.

Work in progress, building up areas of patterned stitching

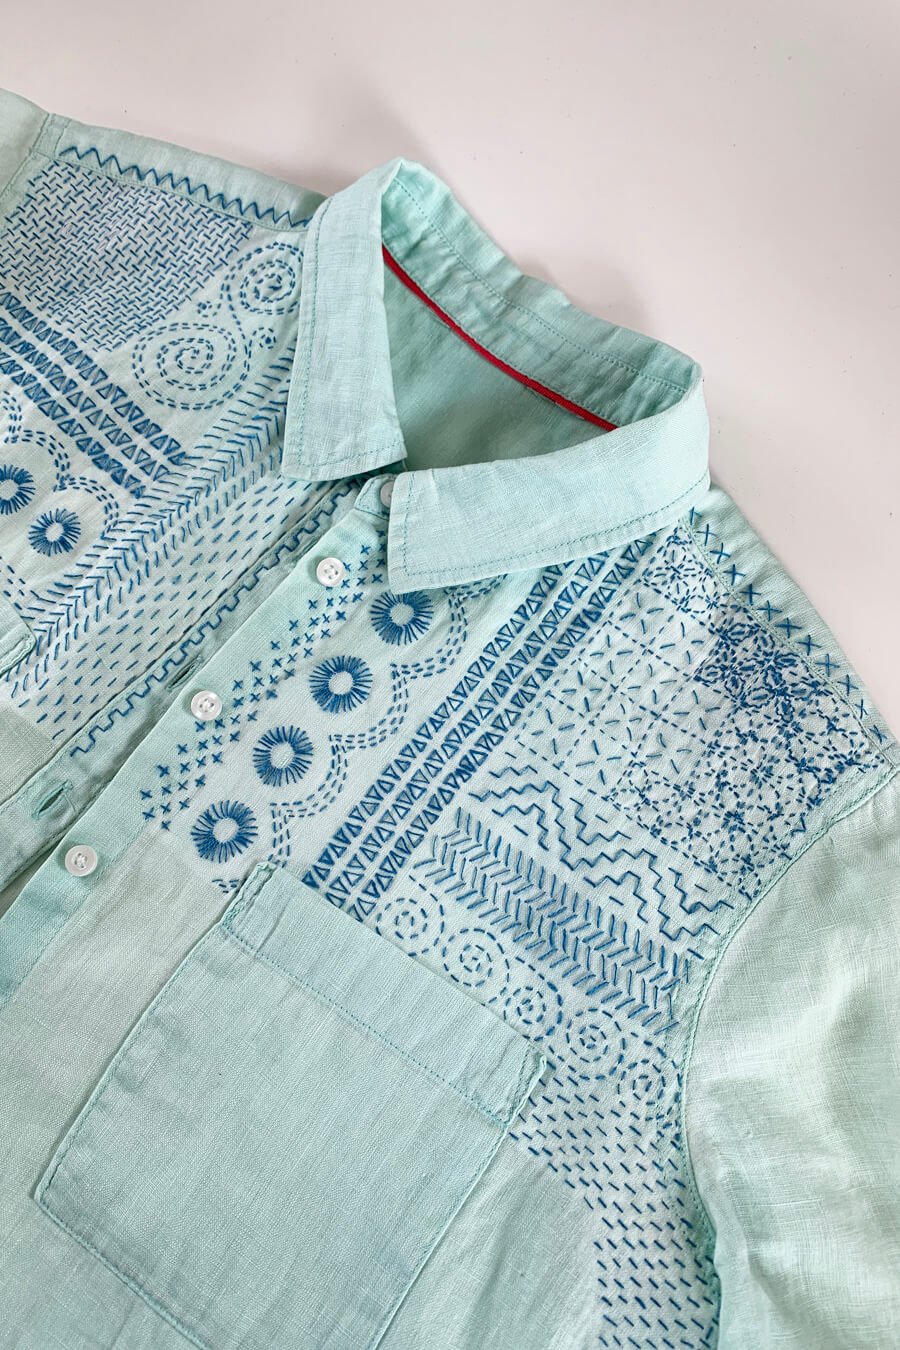
Visibly mended linen shirt front- one side complete!


Washing Repaired Garments
When I posted photos of some of my work in progress on Instagram, I was surprised by how many people asked if I could still wash the shirt after patching and mending it. Repairs shouldn’t stop you washing your garment, but it is important to take washing into account when you choose your materials.
Some embroidery threads can bleed colour when washed, so if you’re not sure it might be advisable to test your threads on a scrap piece of fabric first and wash it, or go for a cold wash, and make sure you don’t soak it. I have to admit I haven’t tested the thread I’ve used here, but I’m planning to wash my shirt as usual, and I don’t expect anything to happen to it.
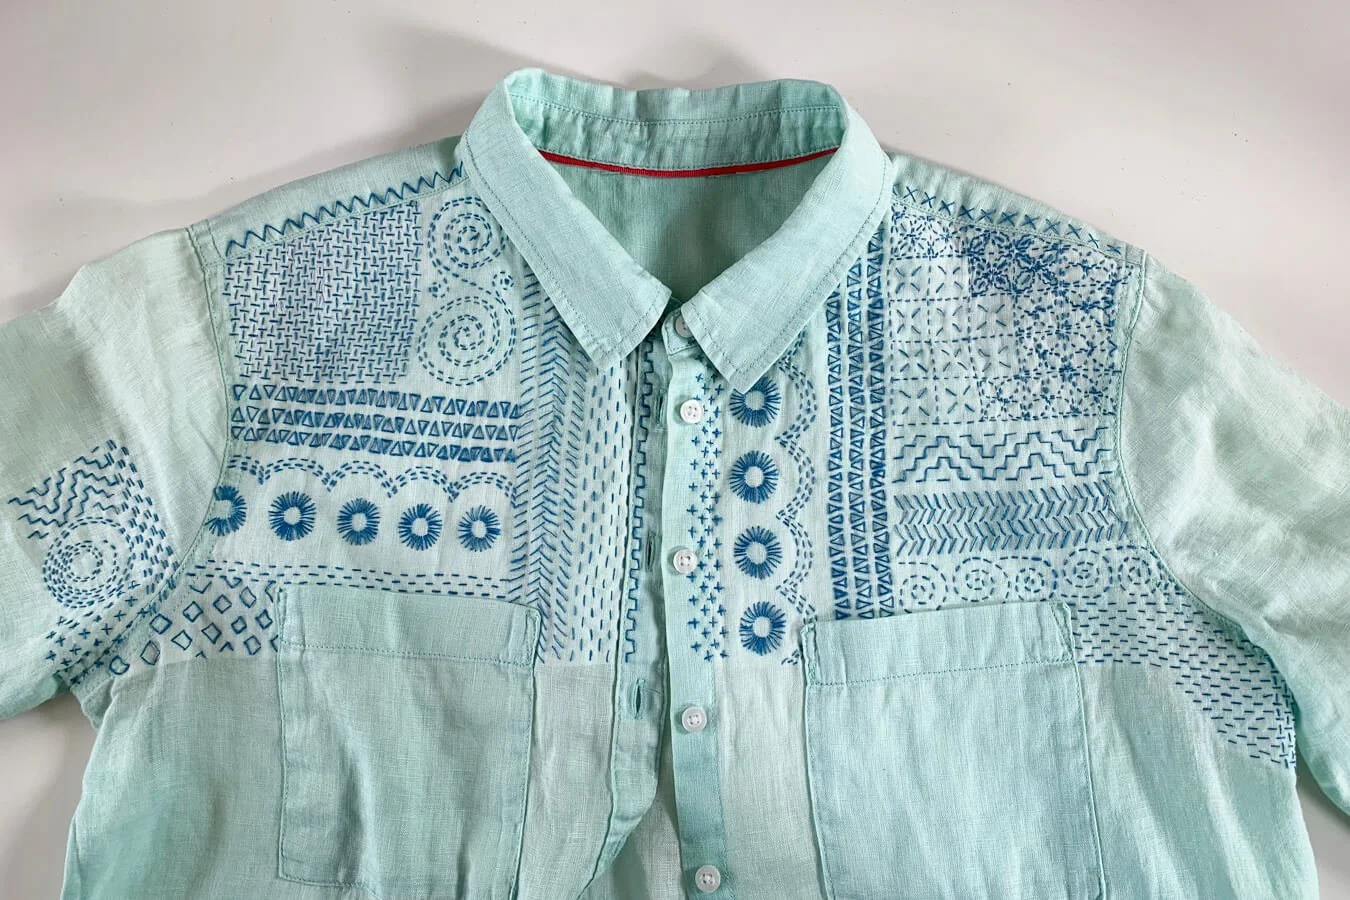
The finished visibly mended linen shirt, with sashiko inspired stitching and intuitive design

I’ve been really enjoying wearing this linen shirt again now it’s been visibly mended!