

Visible Mending
As part of my new resolution to keep my knitwear going for longer and reduce waste (although most of it has been going for many years already and was second hand to start with!), I've decided to try my hand at some visible mending.
It's not something I've tried before, and I thought I'd share my first attempt with an old cardigan, in stages!
Creative Mending using Swiss Darning
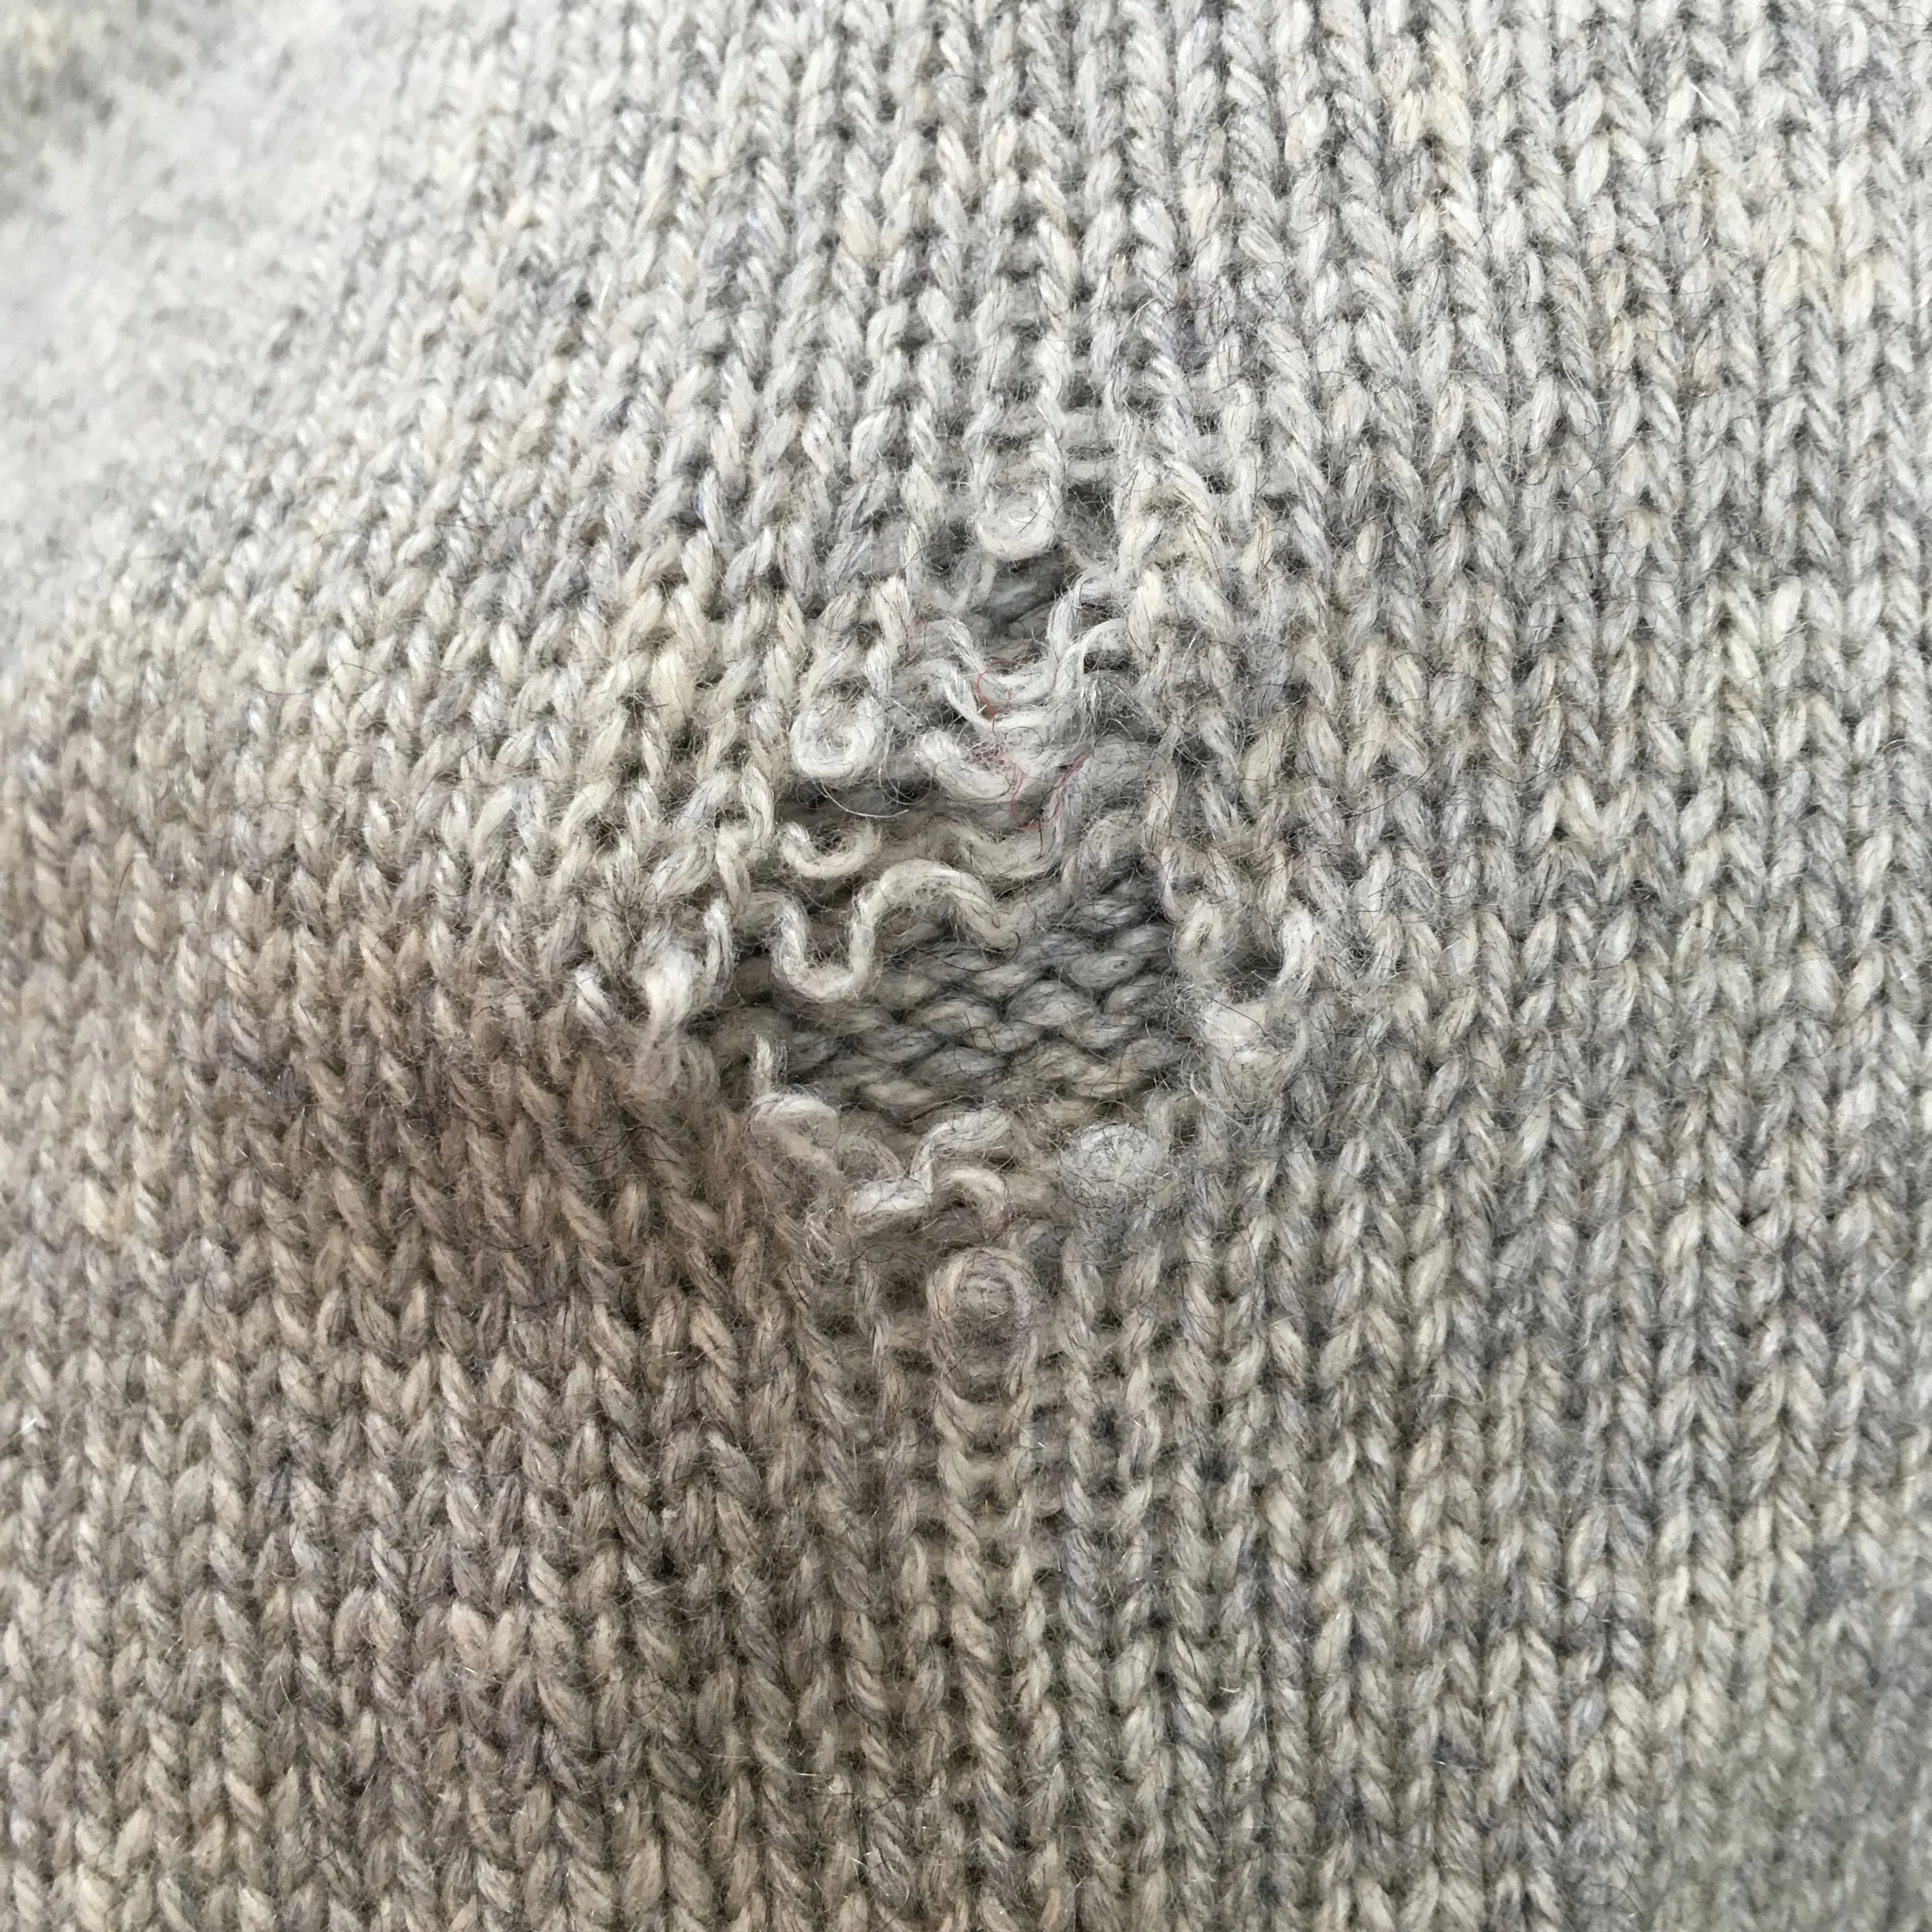
A hole at the elbow- big enough to need a sizeable mend.
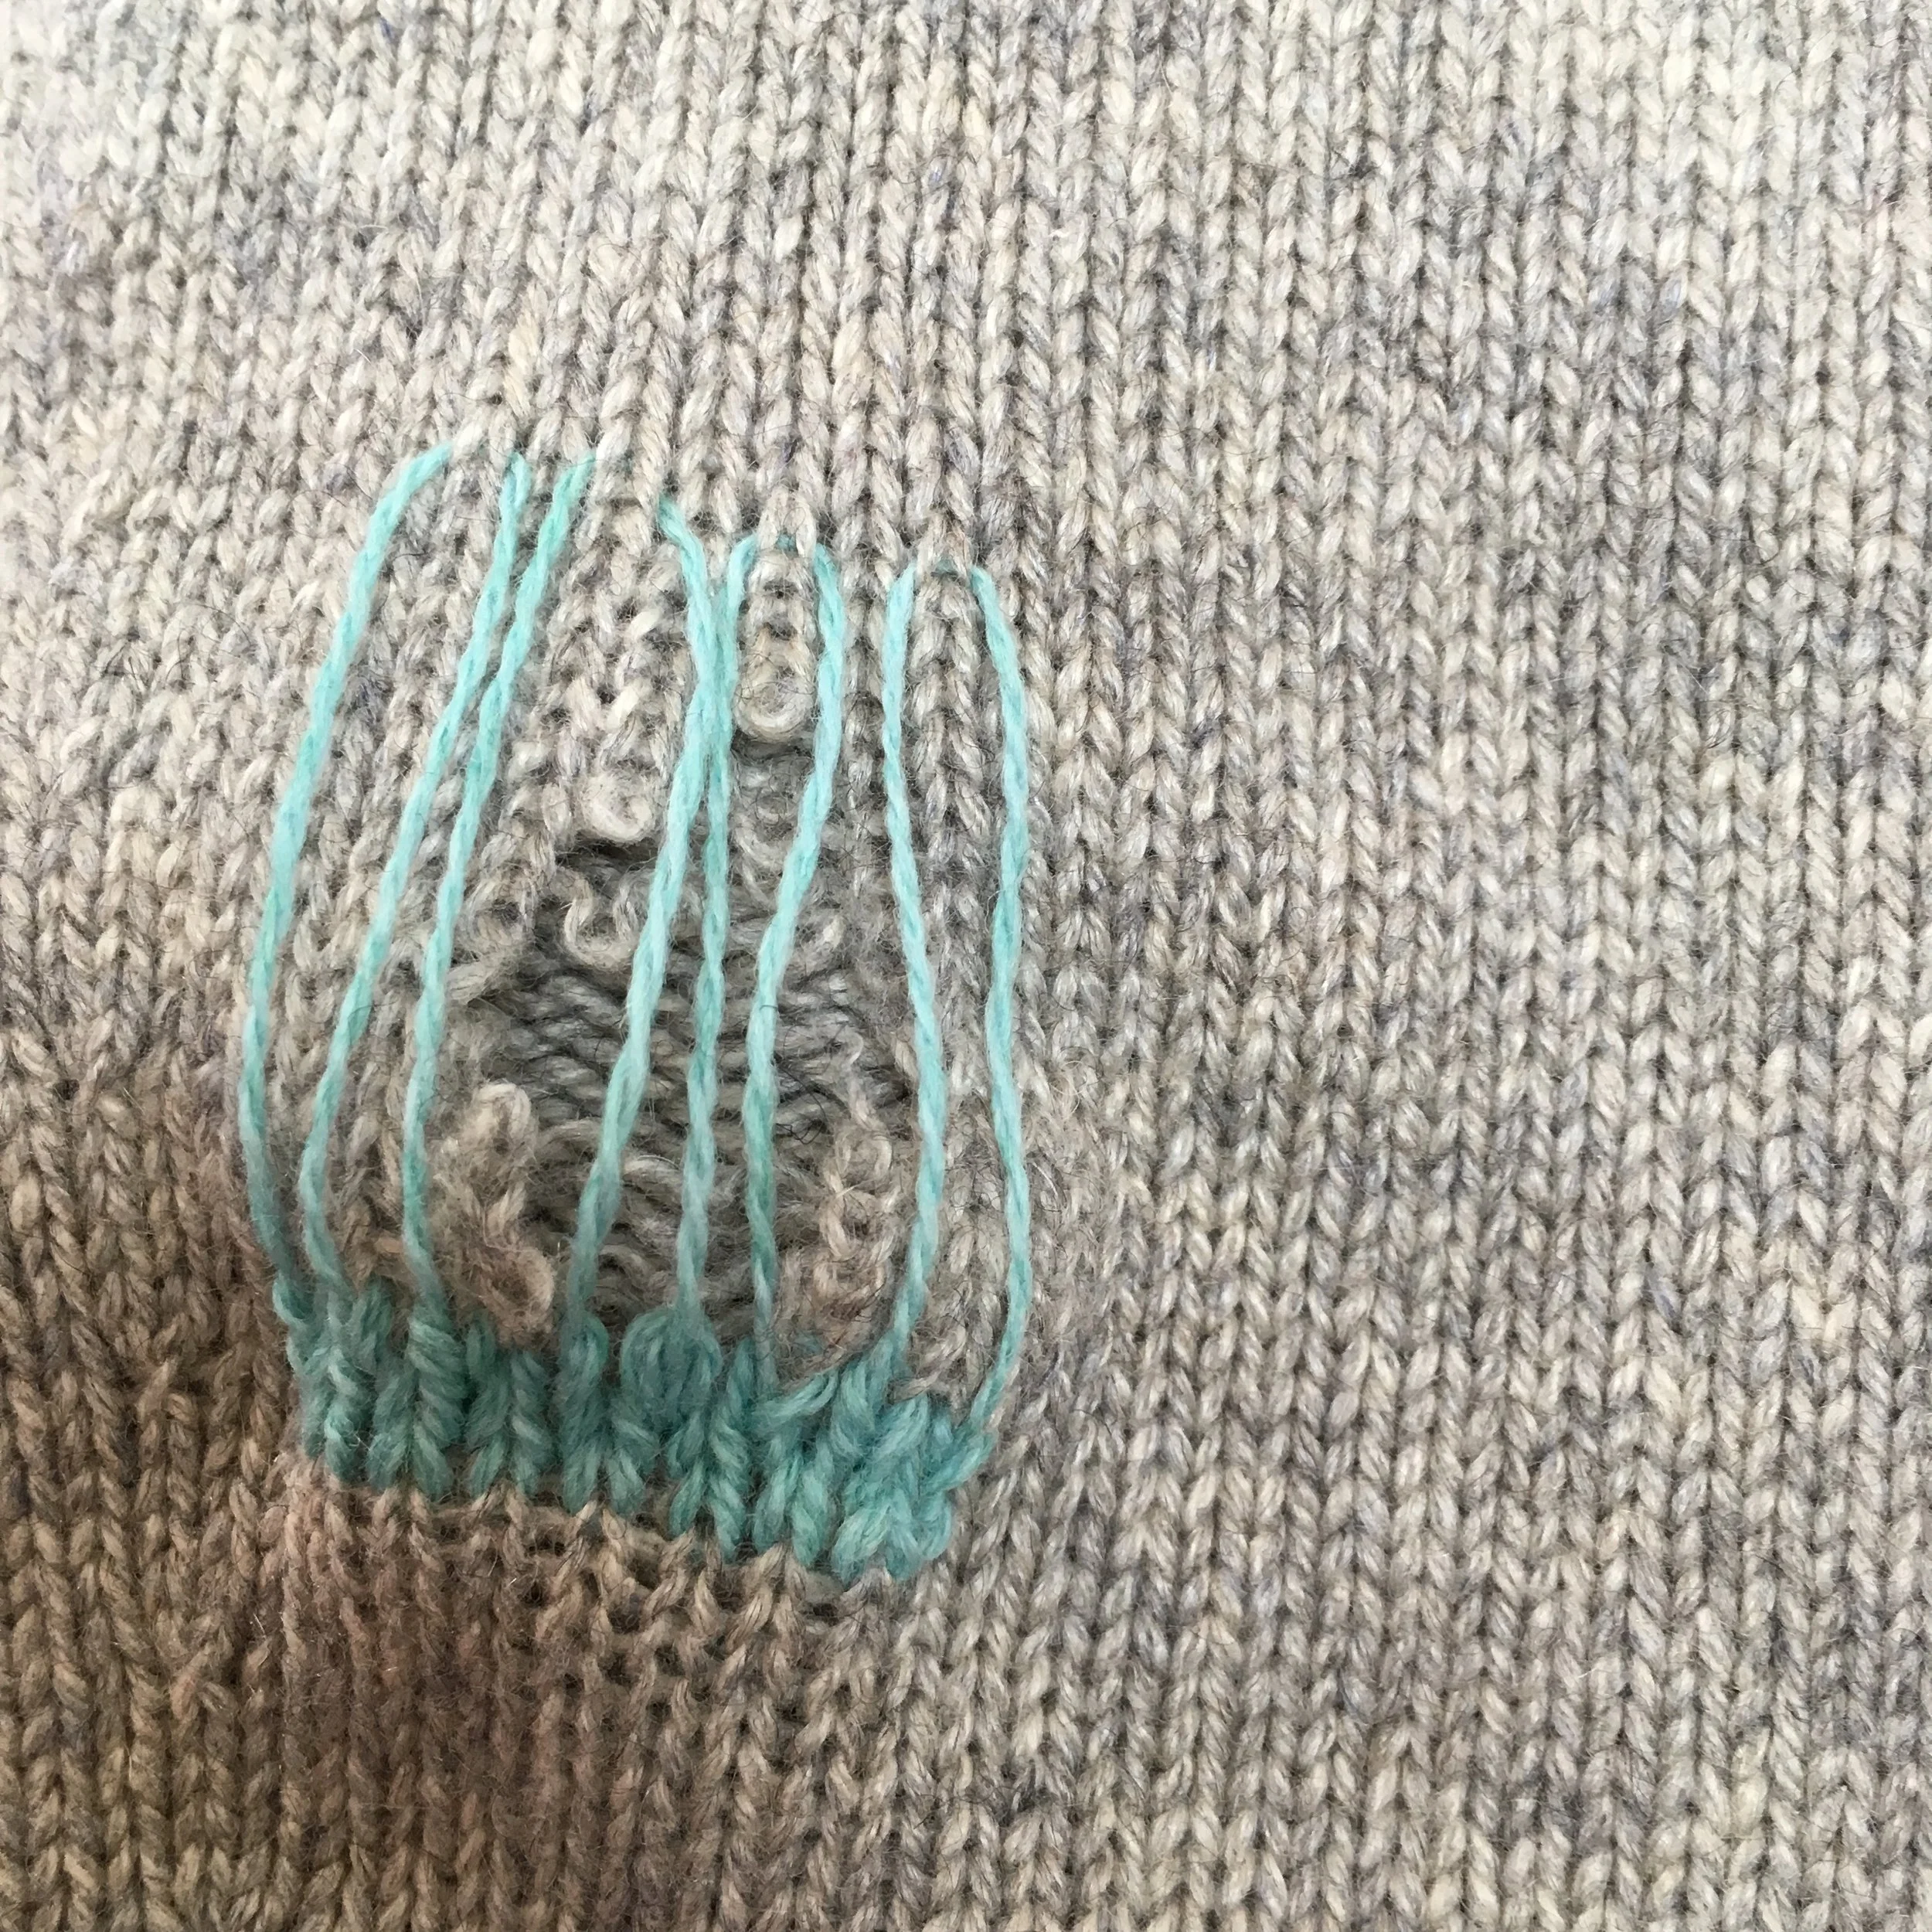
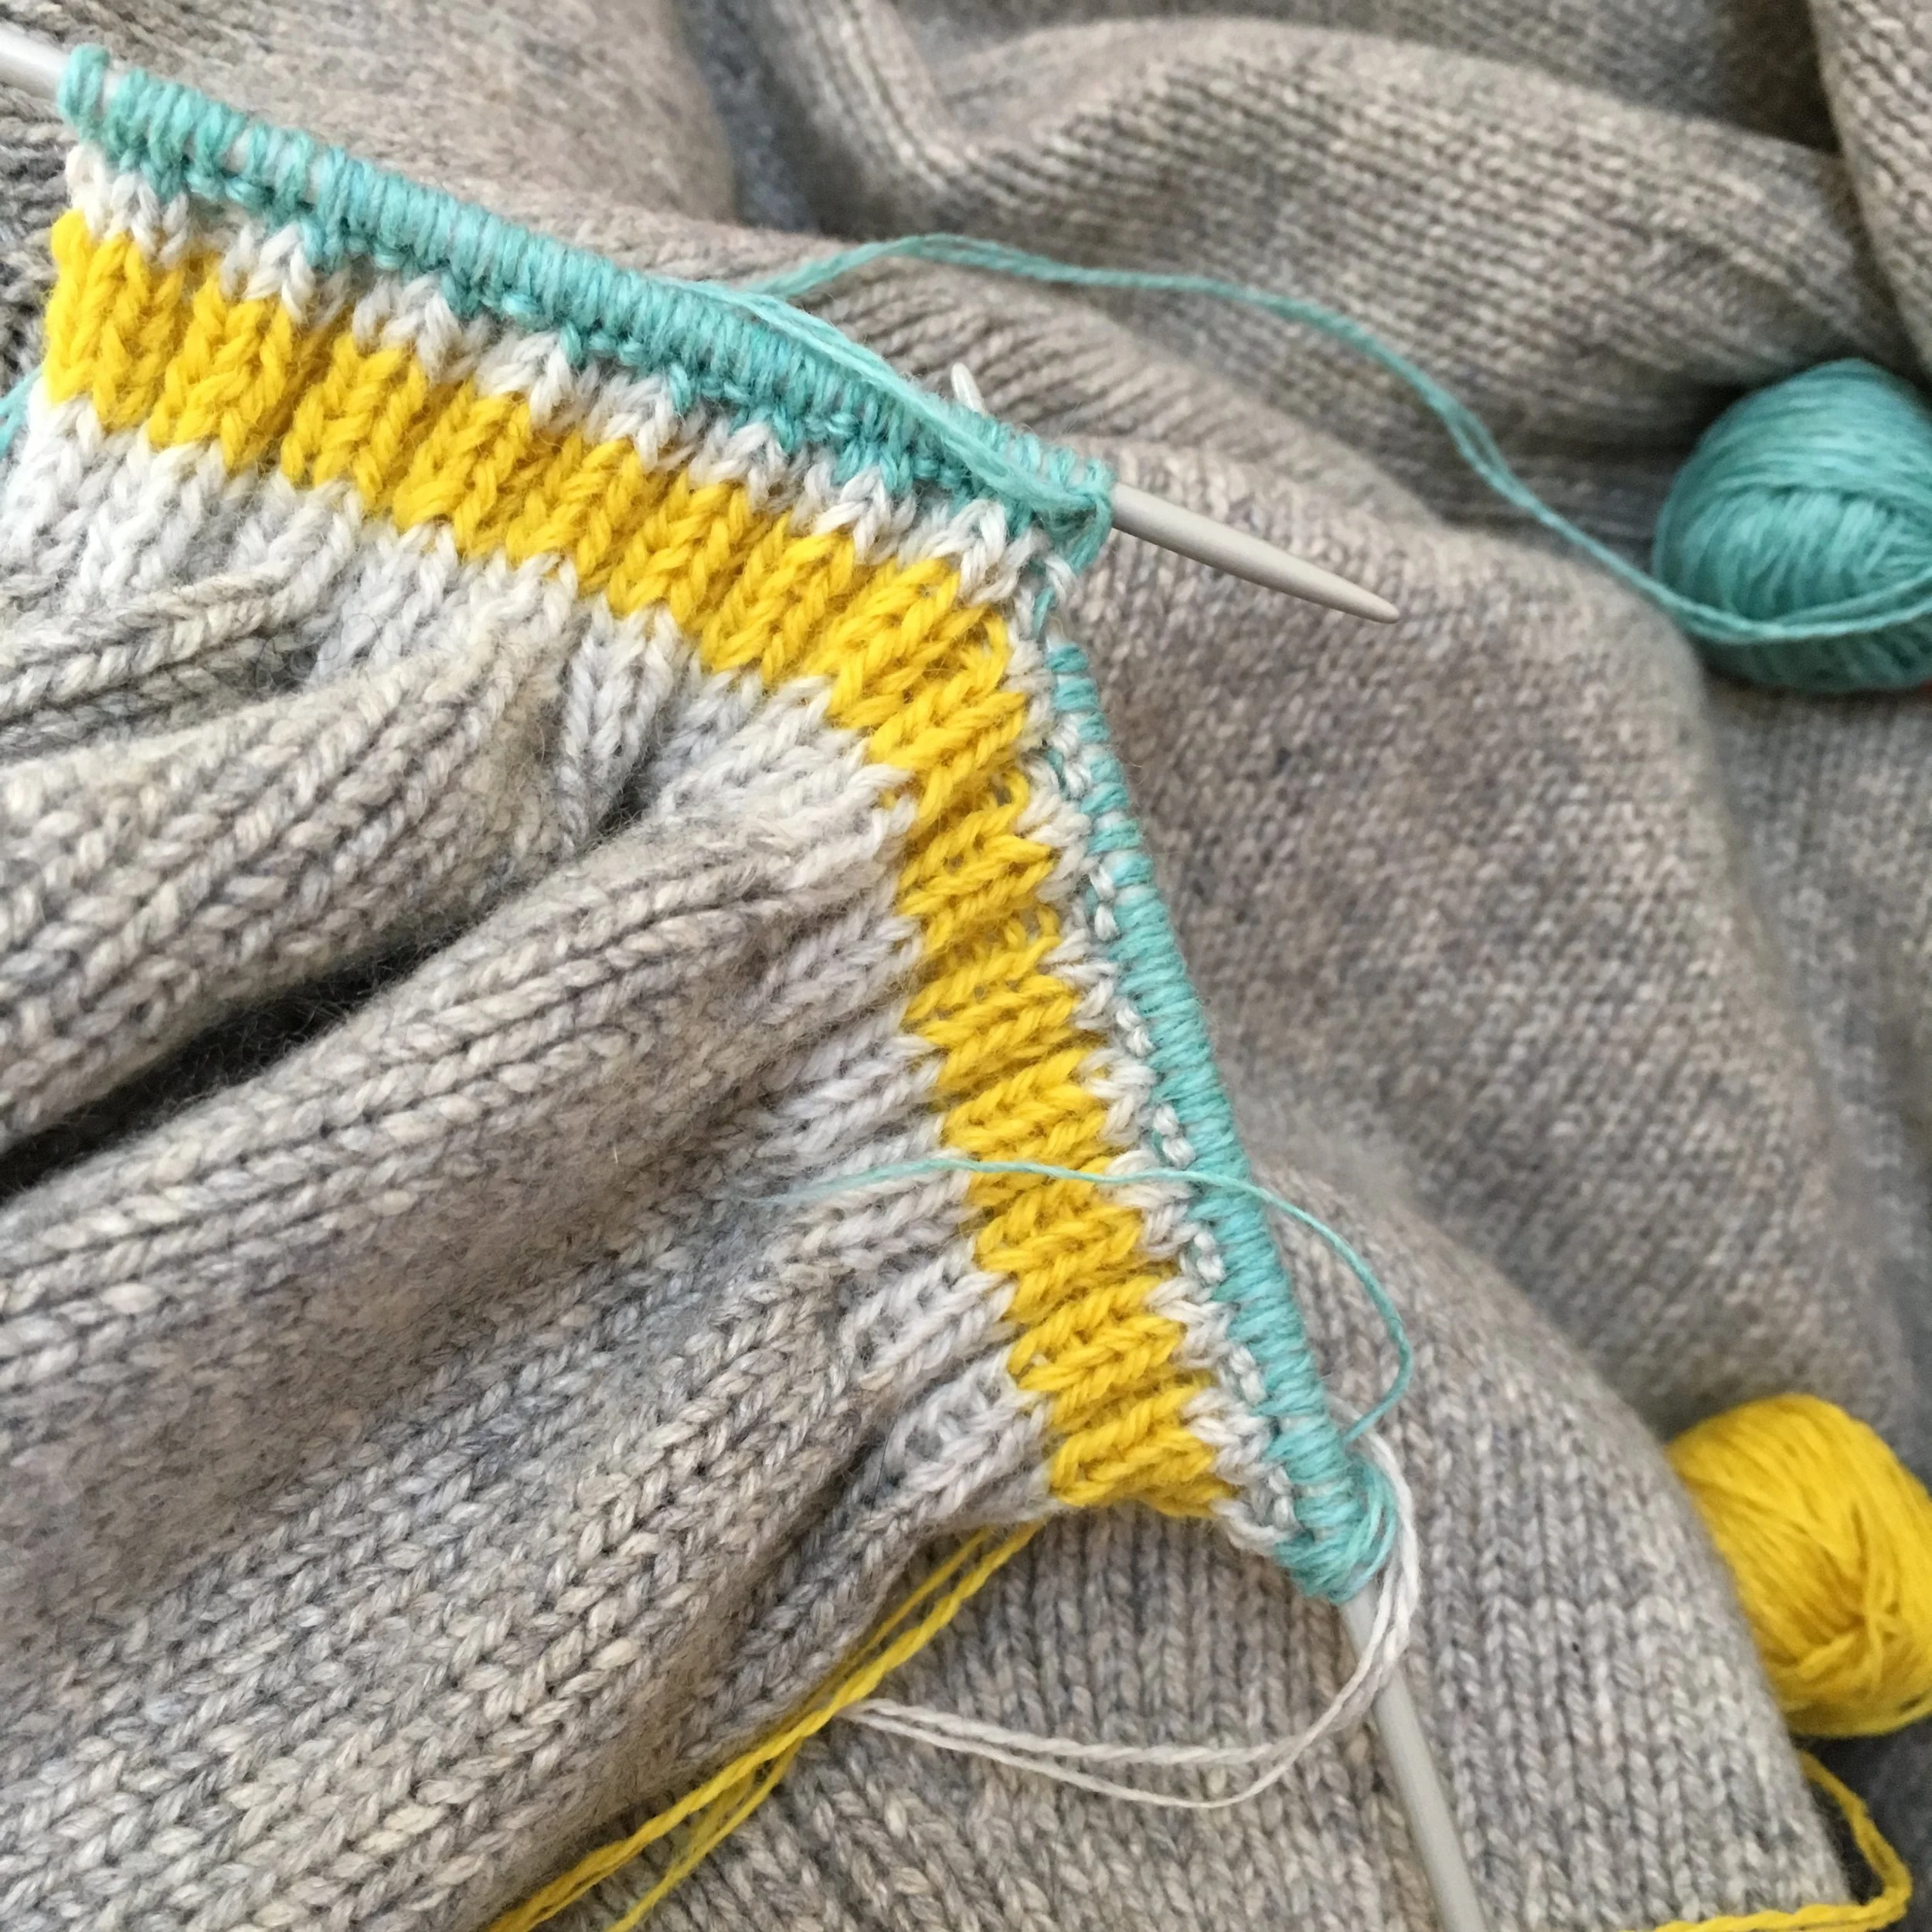
Step 1: Starting to use Swiss Darning to mend the hole.
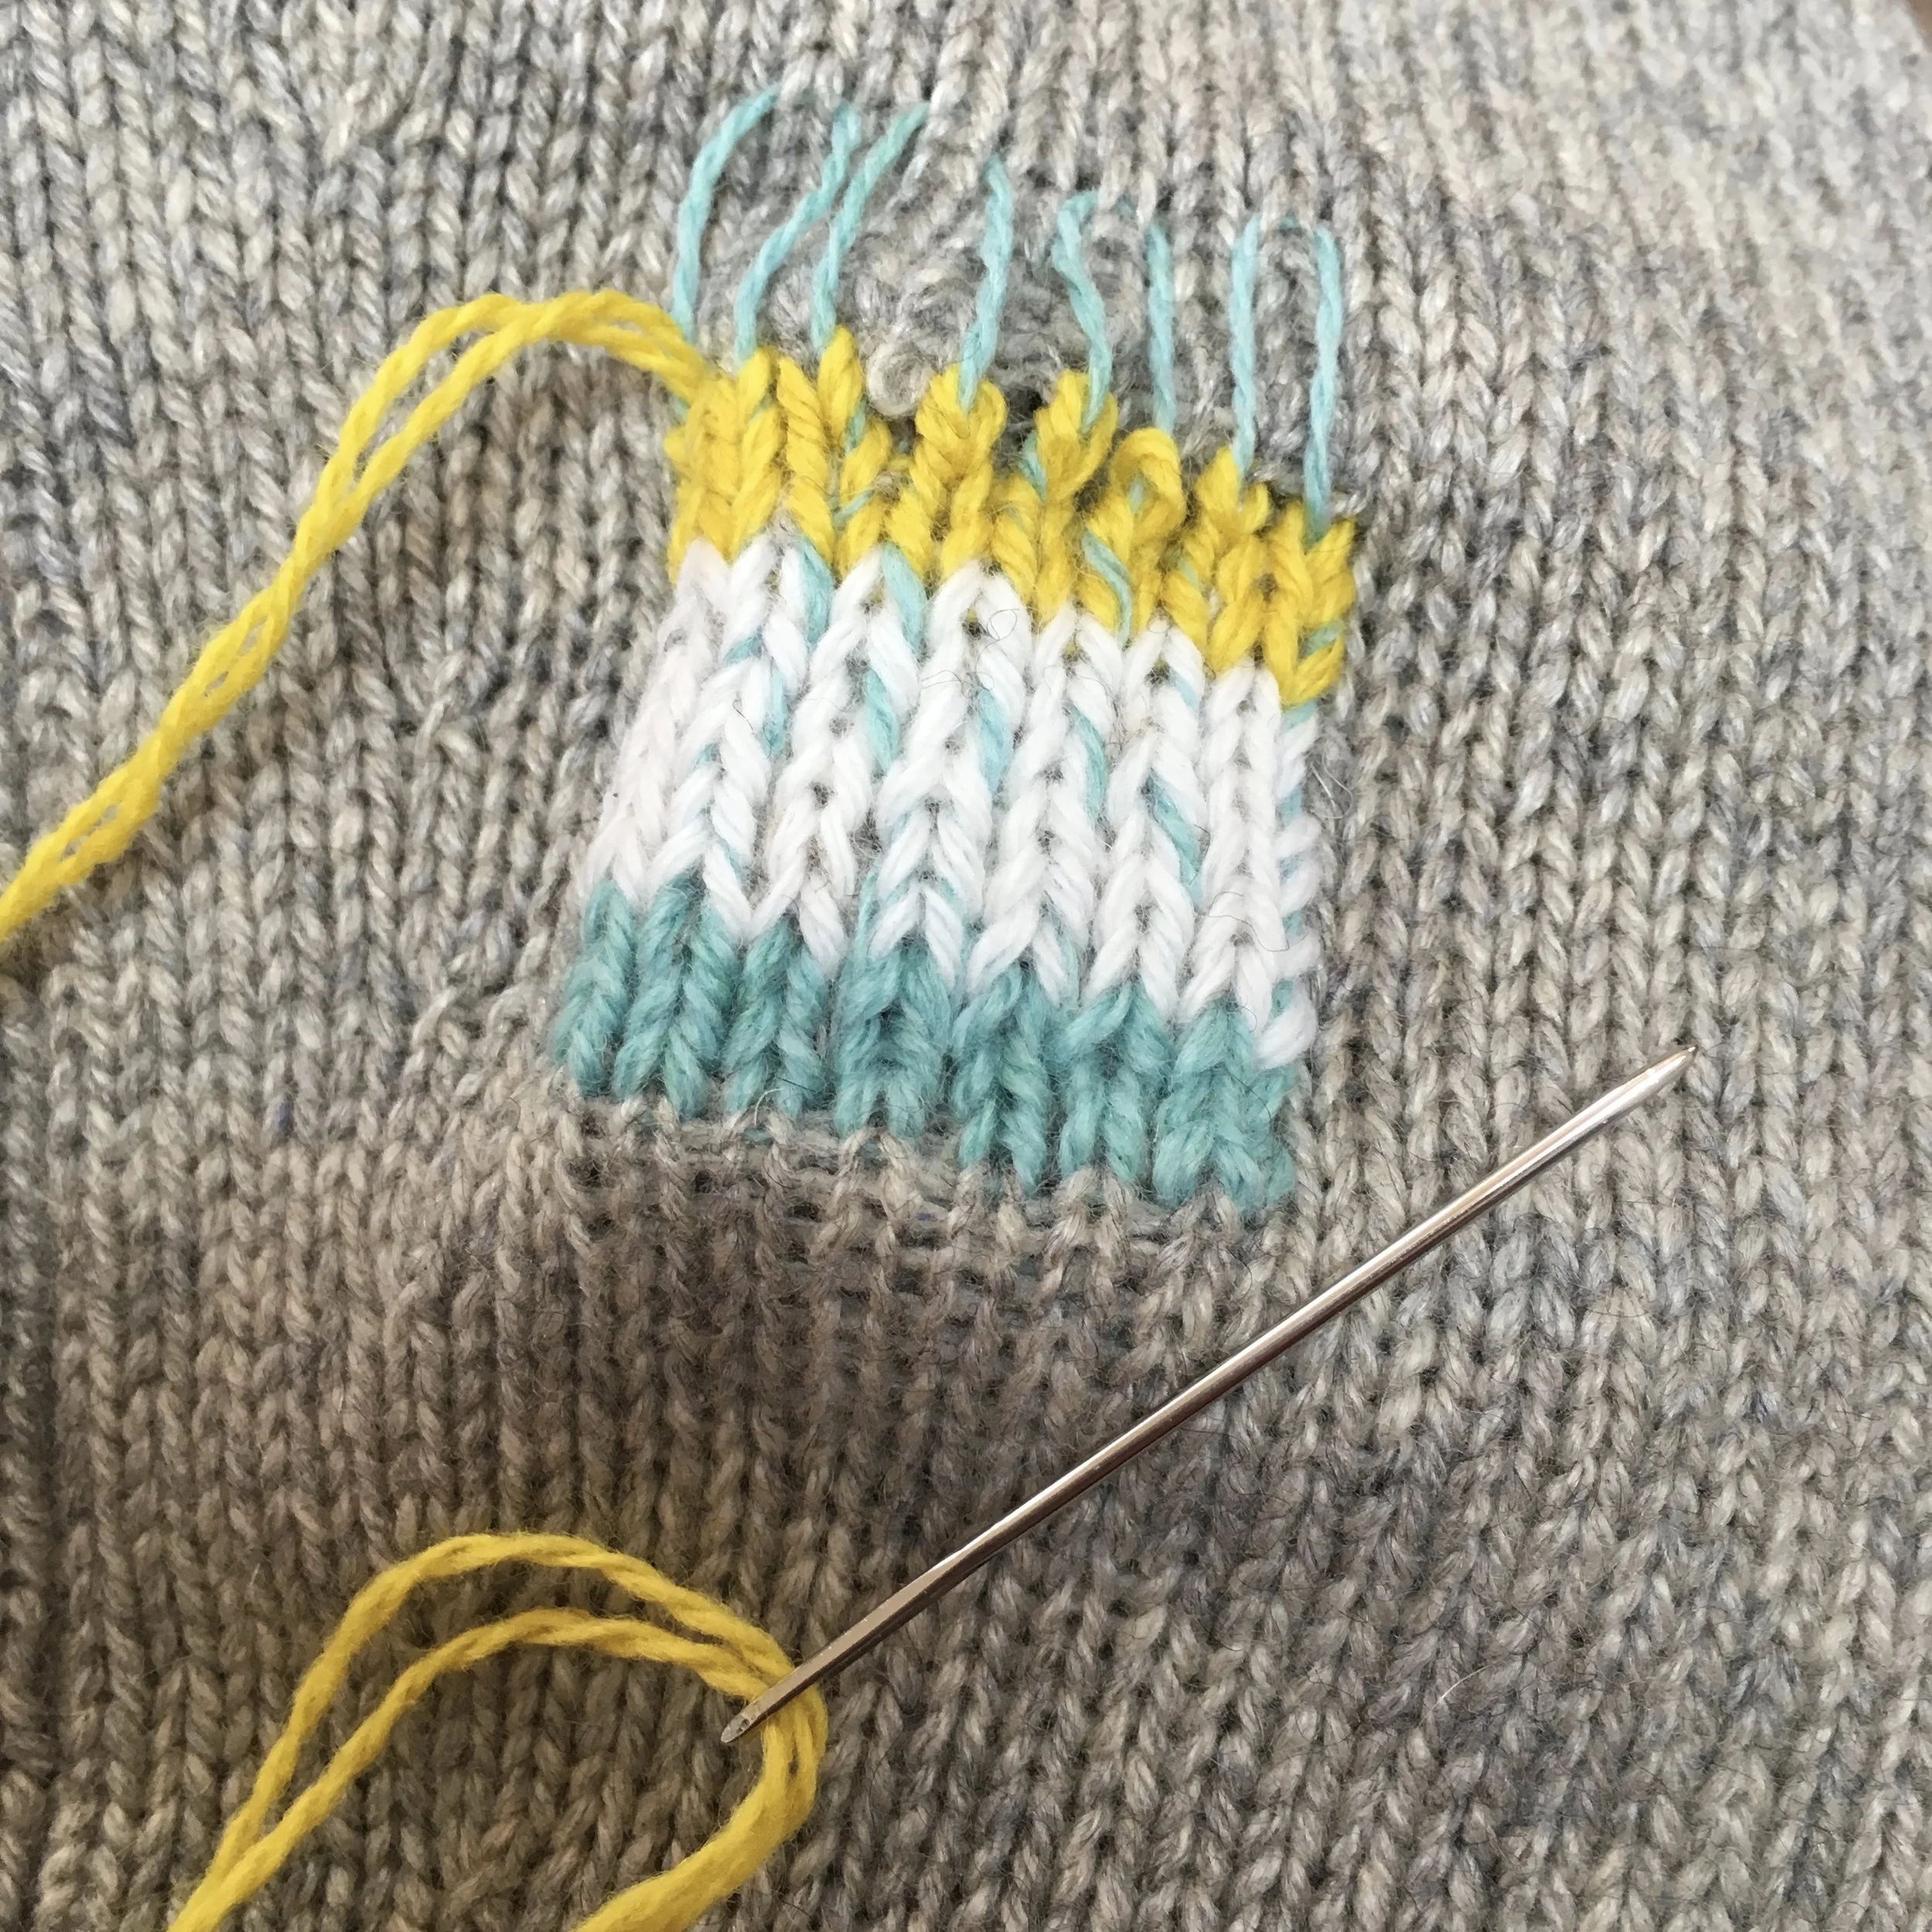
Building up the mend. I started changing colours, just for fun.
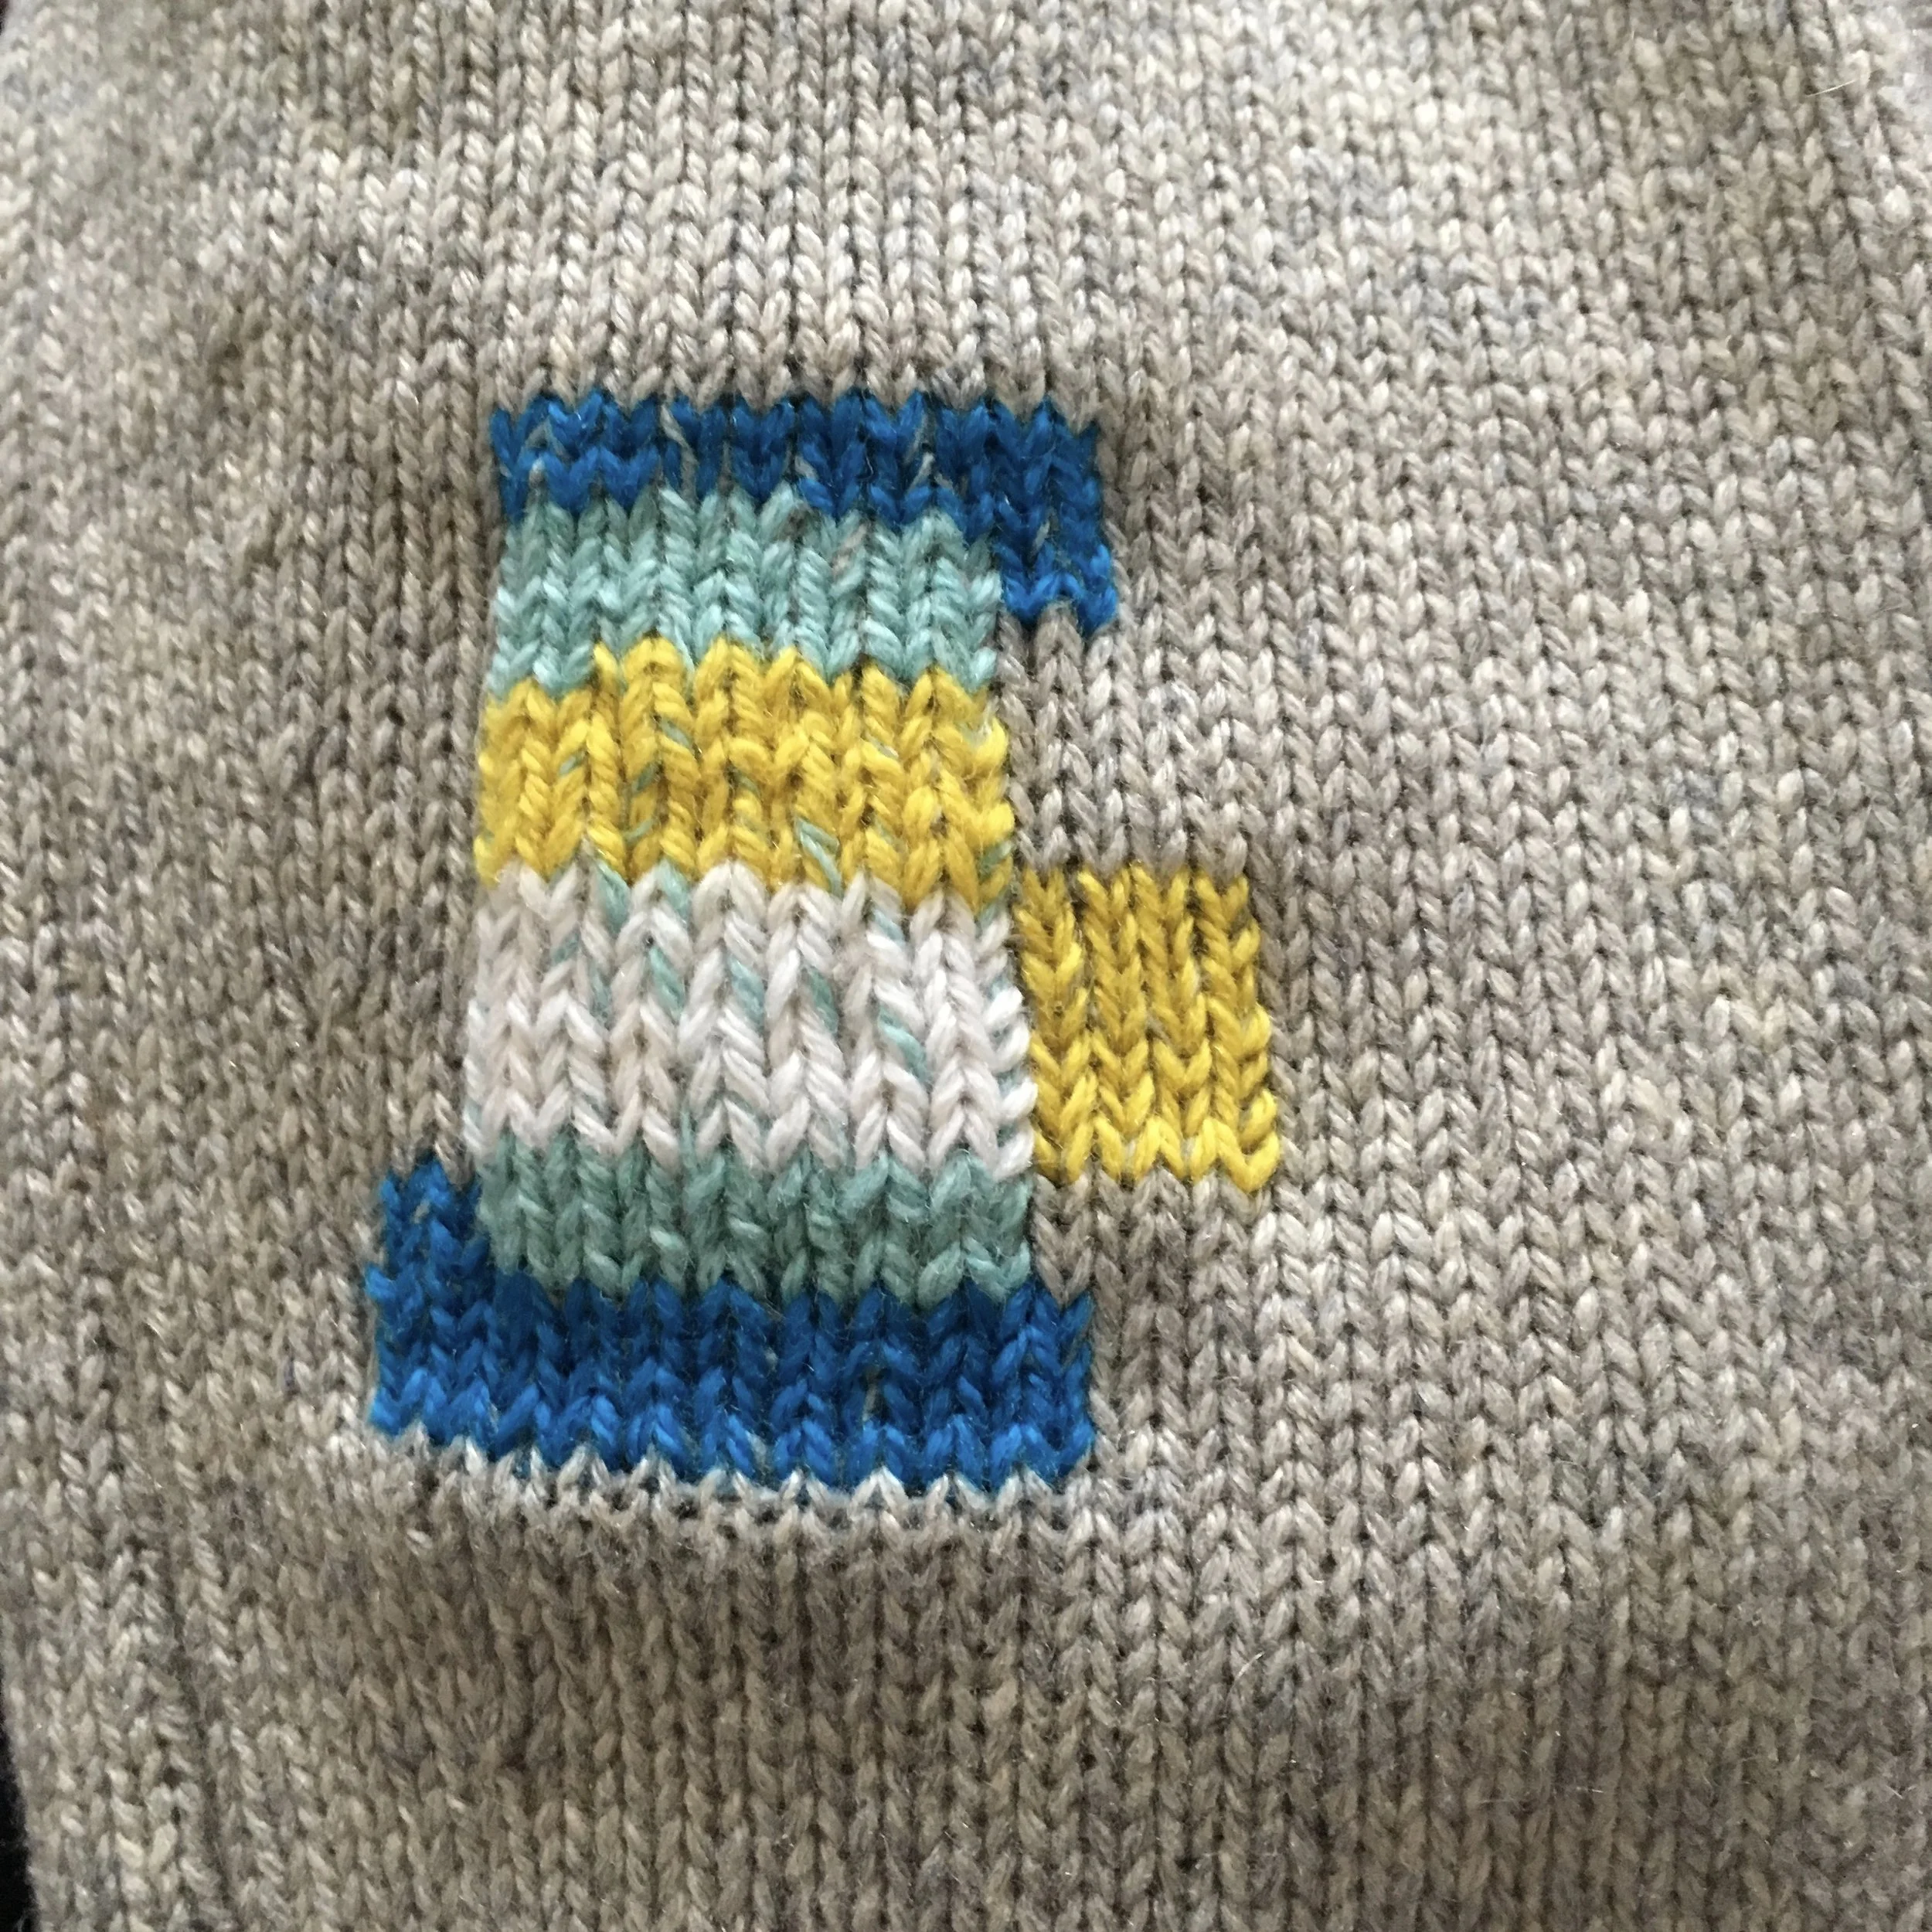
I decided to add blocks of colour outside the original area for mending using more Swiss darning, The surrounding area was thinner than the rest of the cardigan, so the extra colour blocks will help to strengthen it.
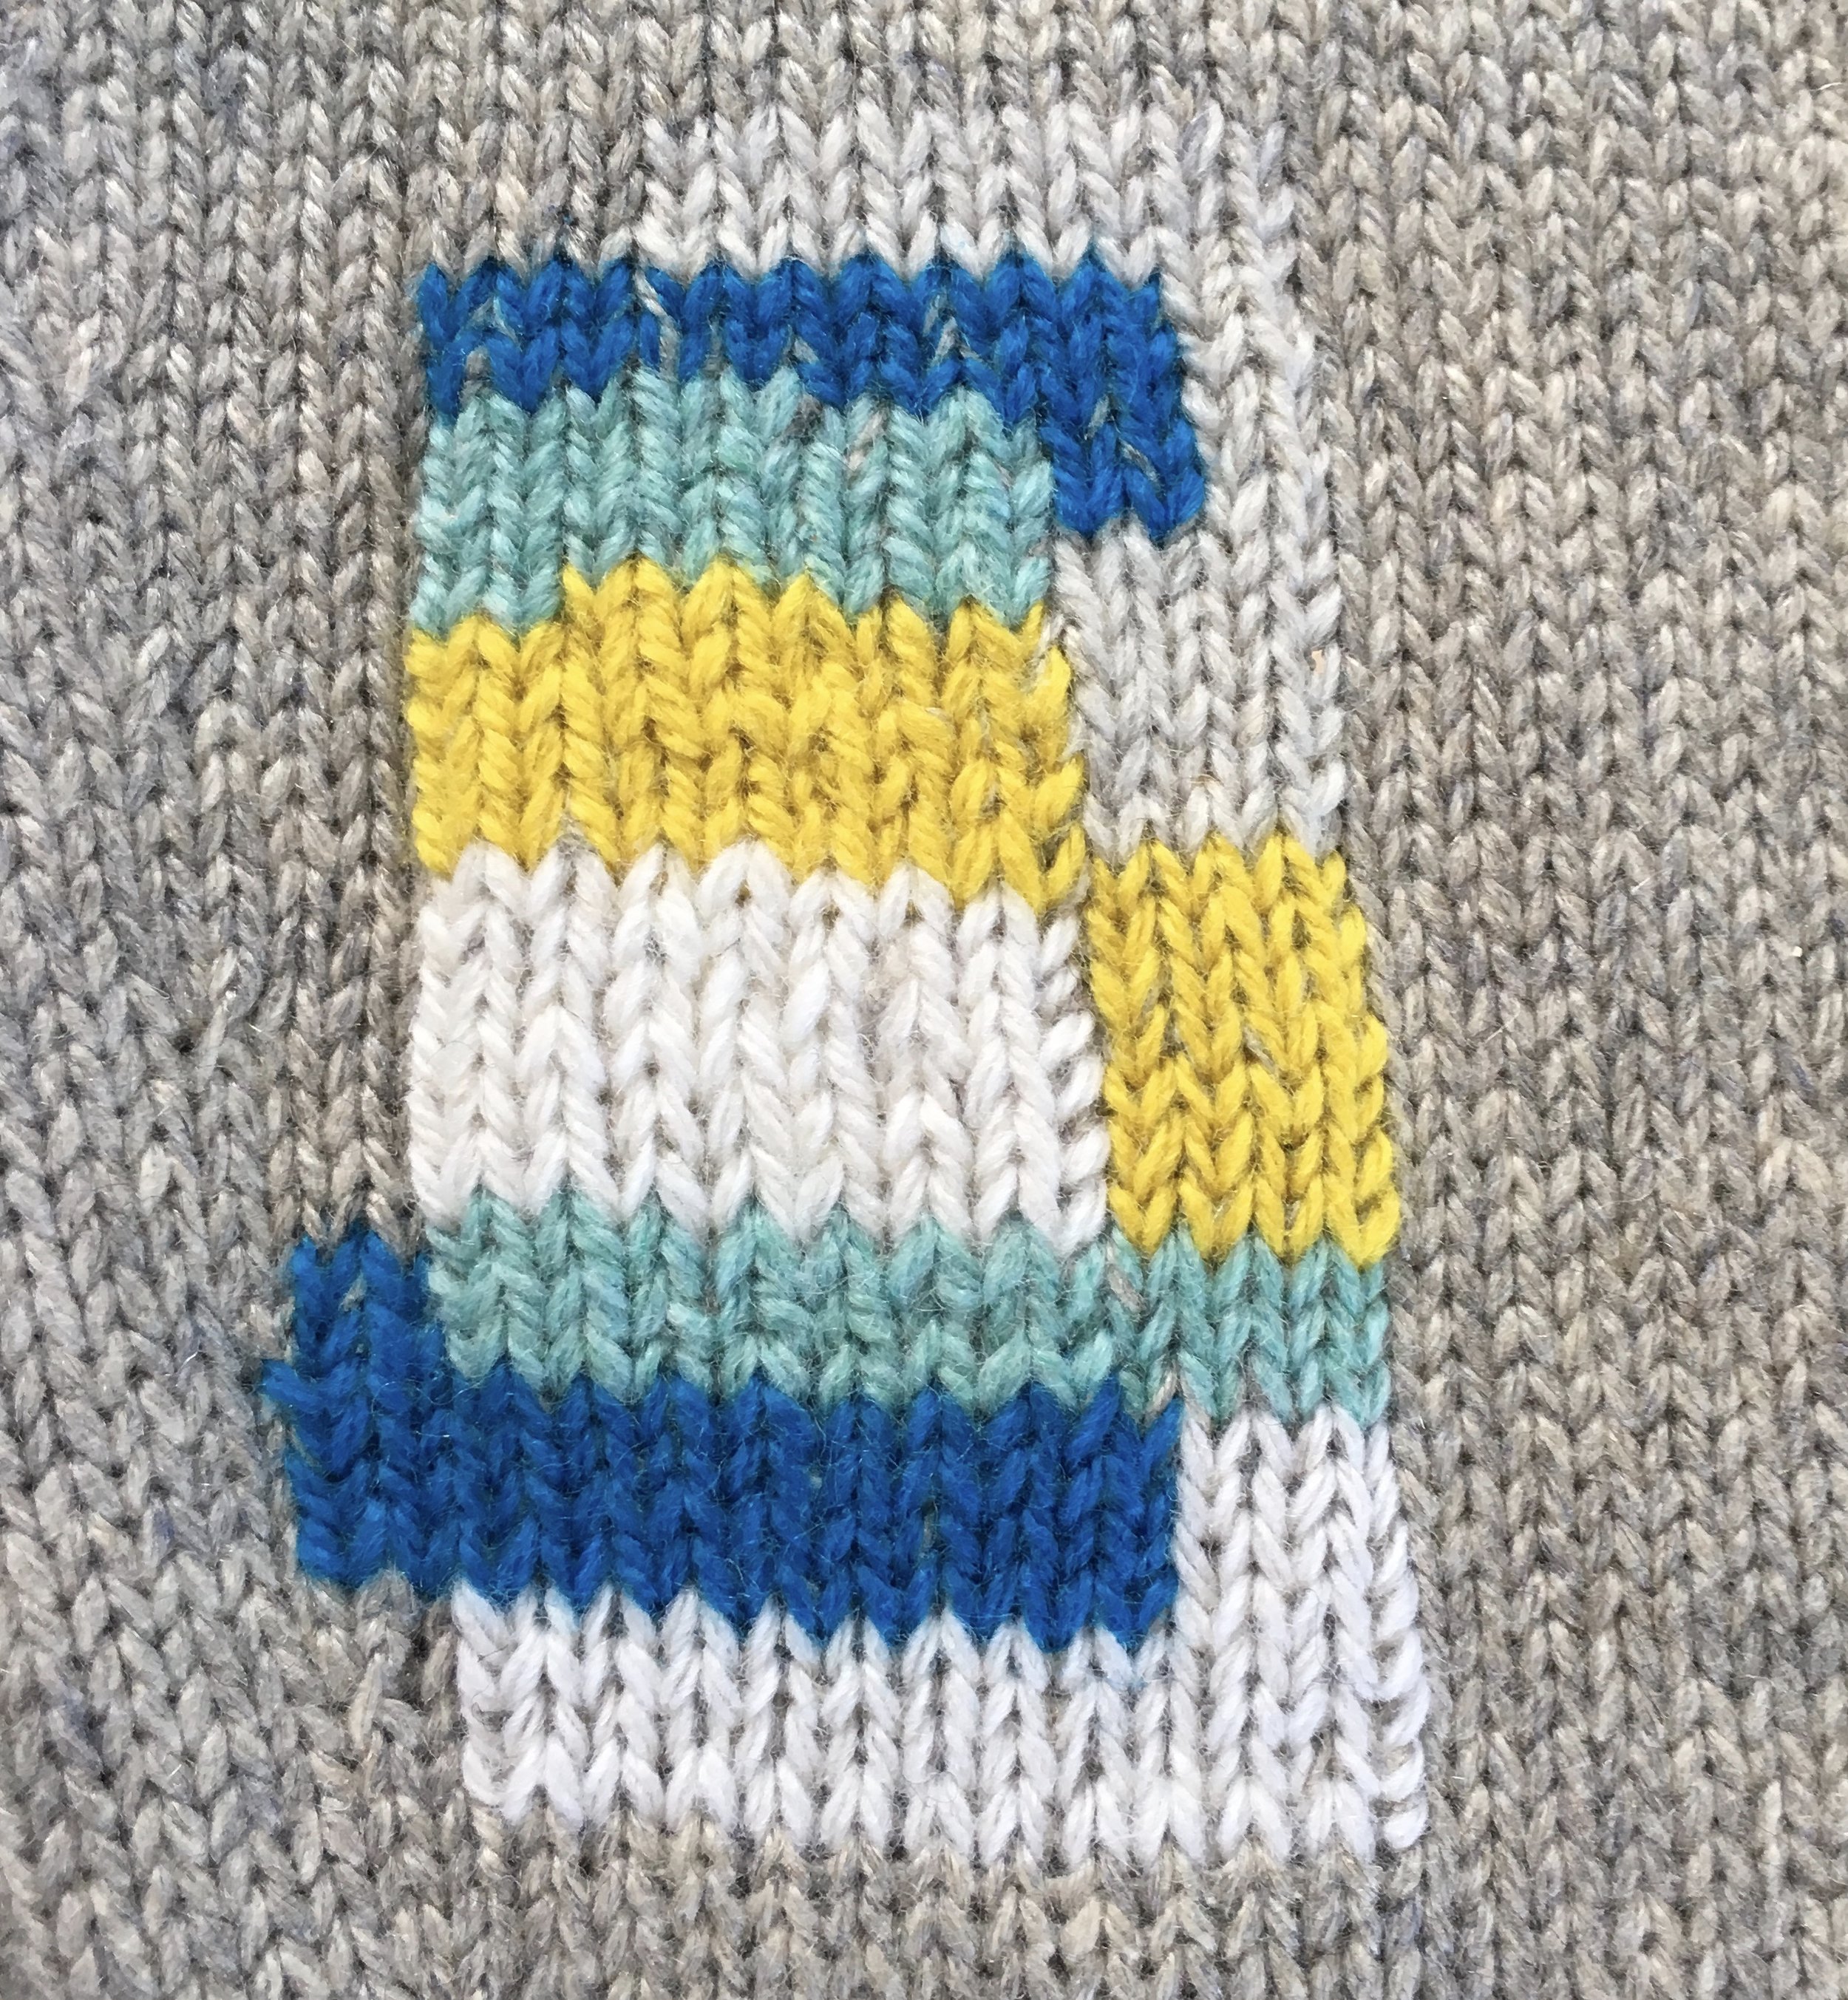
The final mended area, with the original vertical threads picked out.
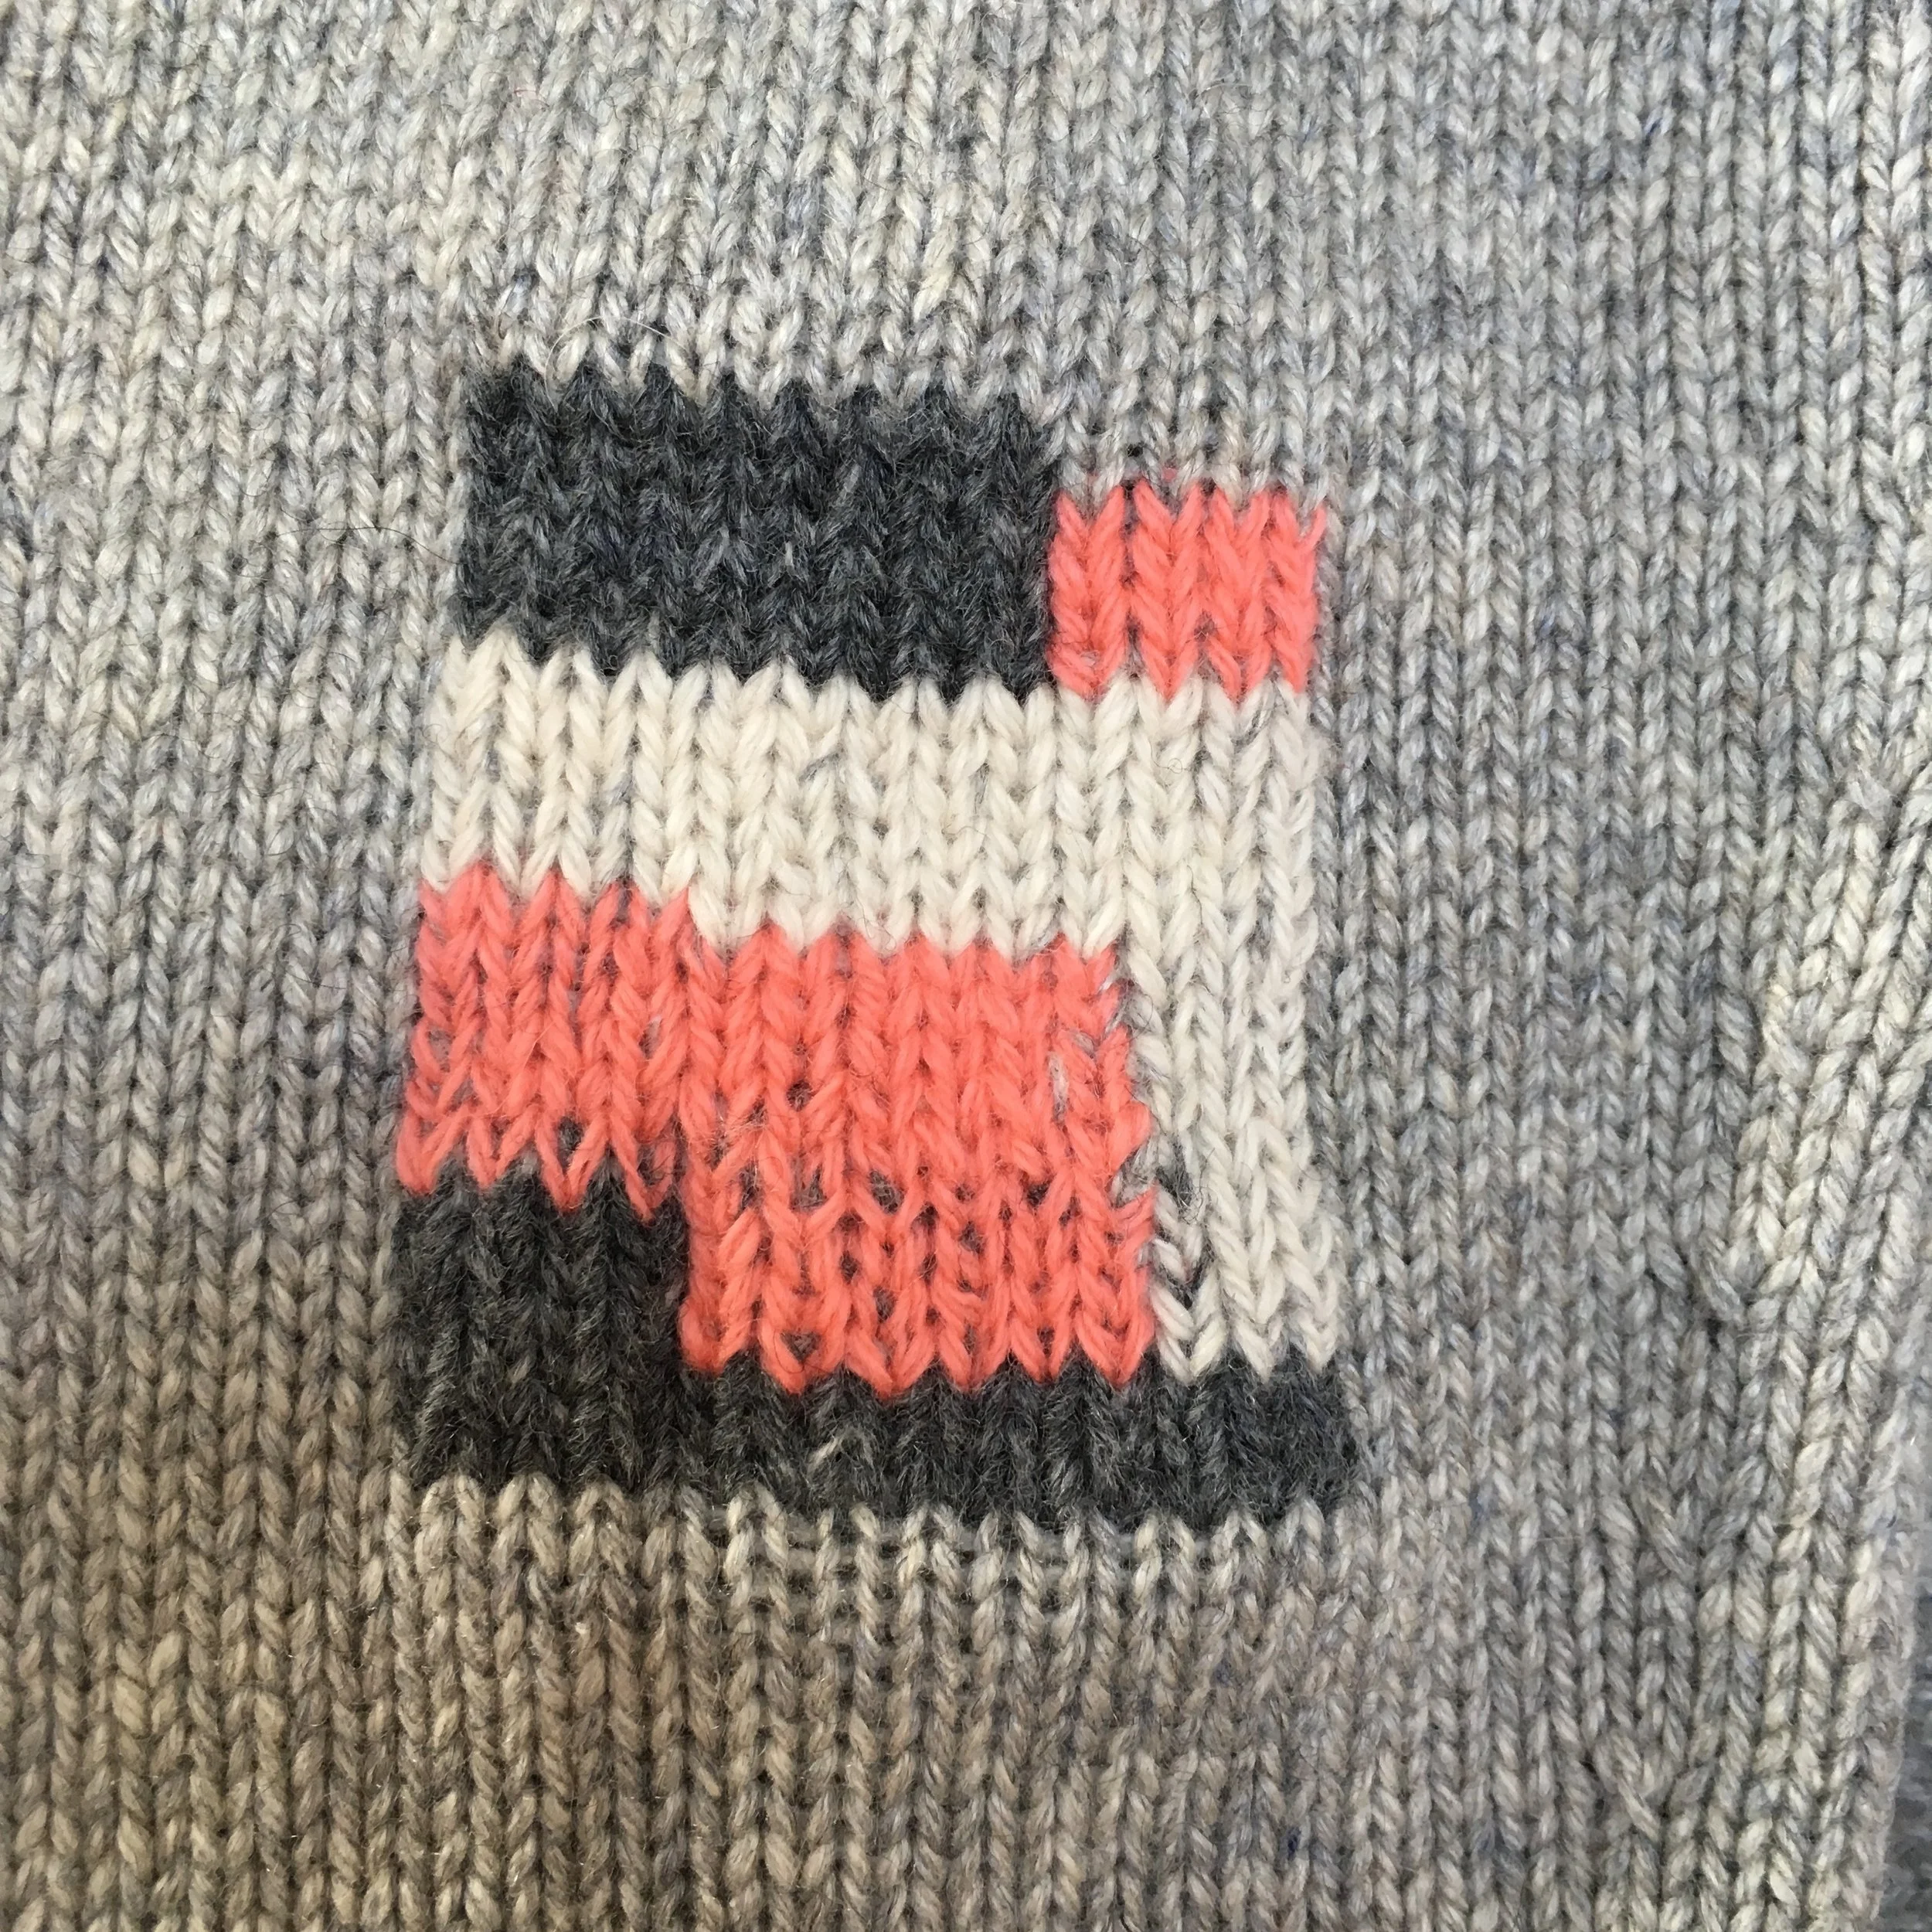
The other elbow, which was in a similar state. As holes are rarely the same, I though the mends should reflect their unique nature and be different!
Replacing Fraying Cuffs
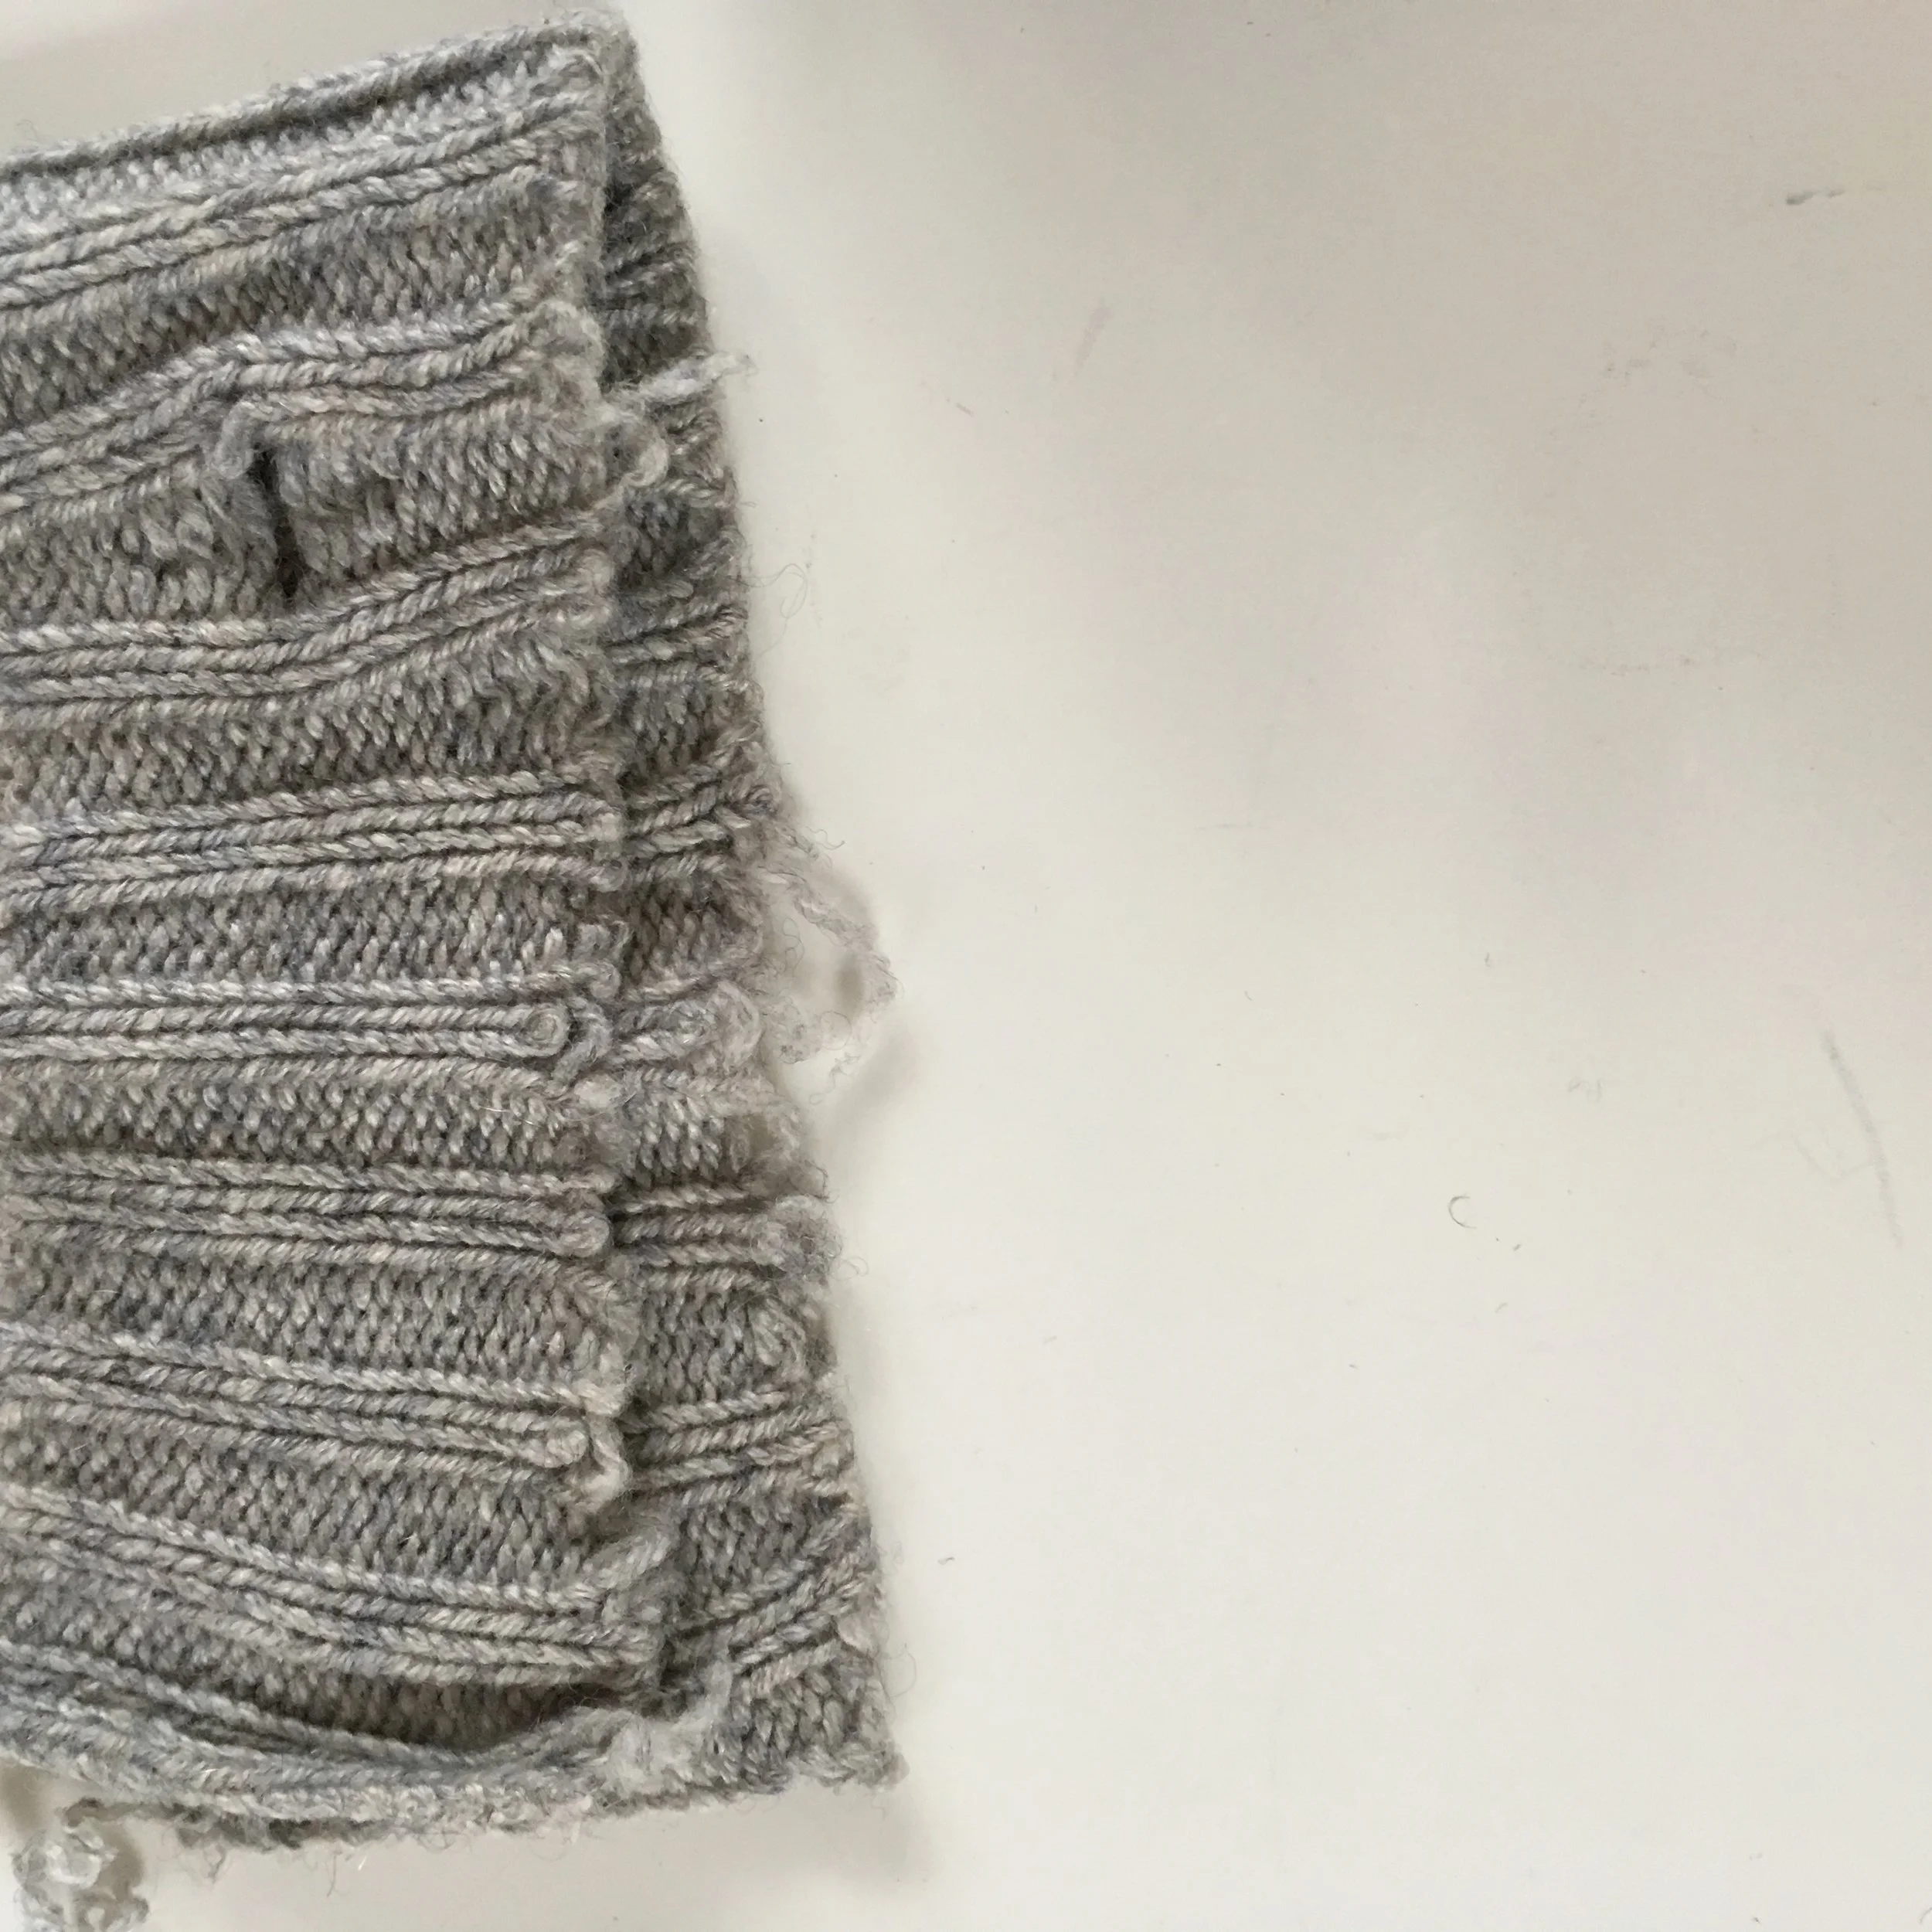
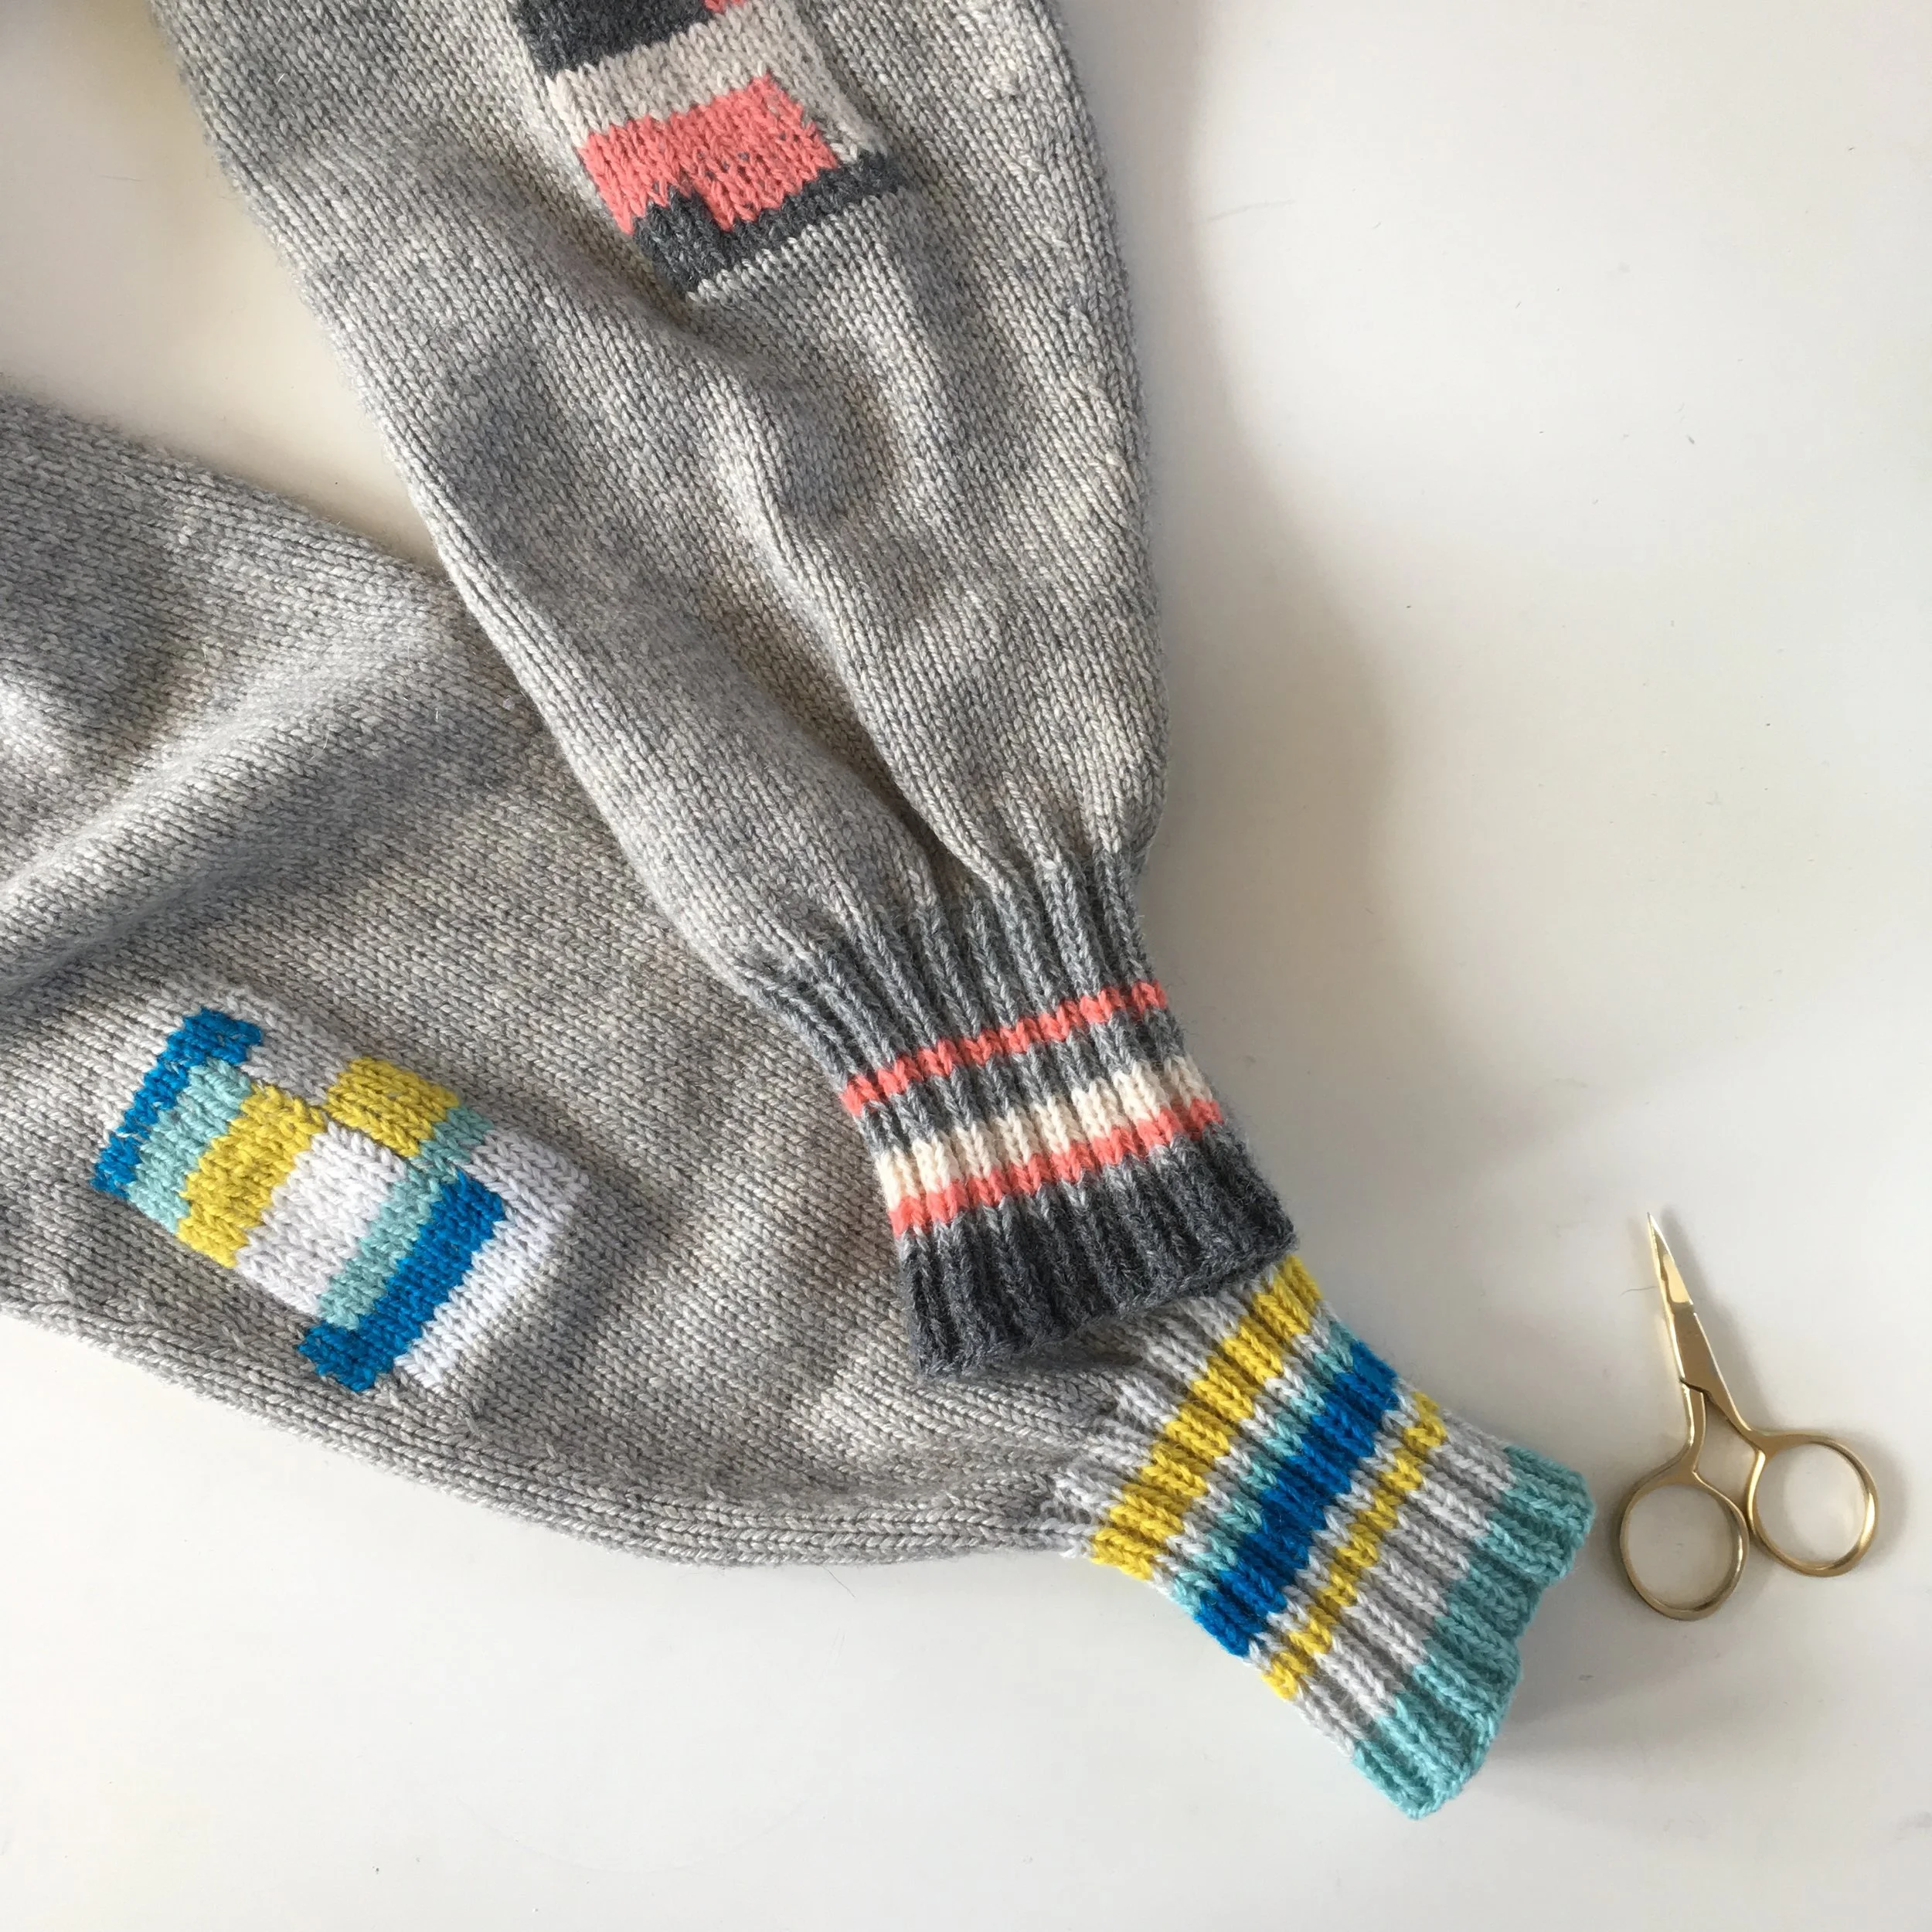
One of the cuffs, which was fraying at the edge, and had a hole.
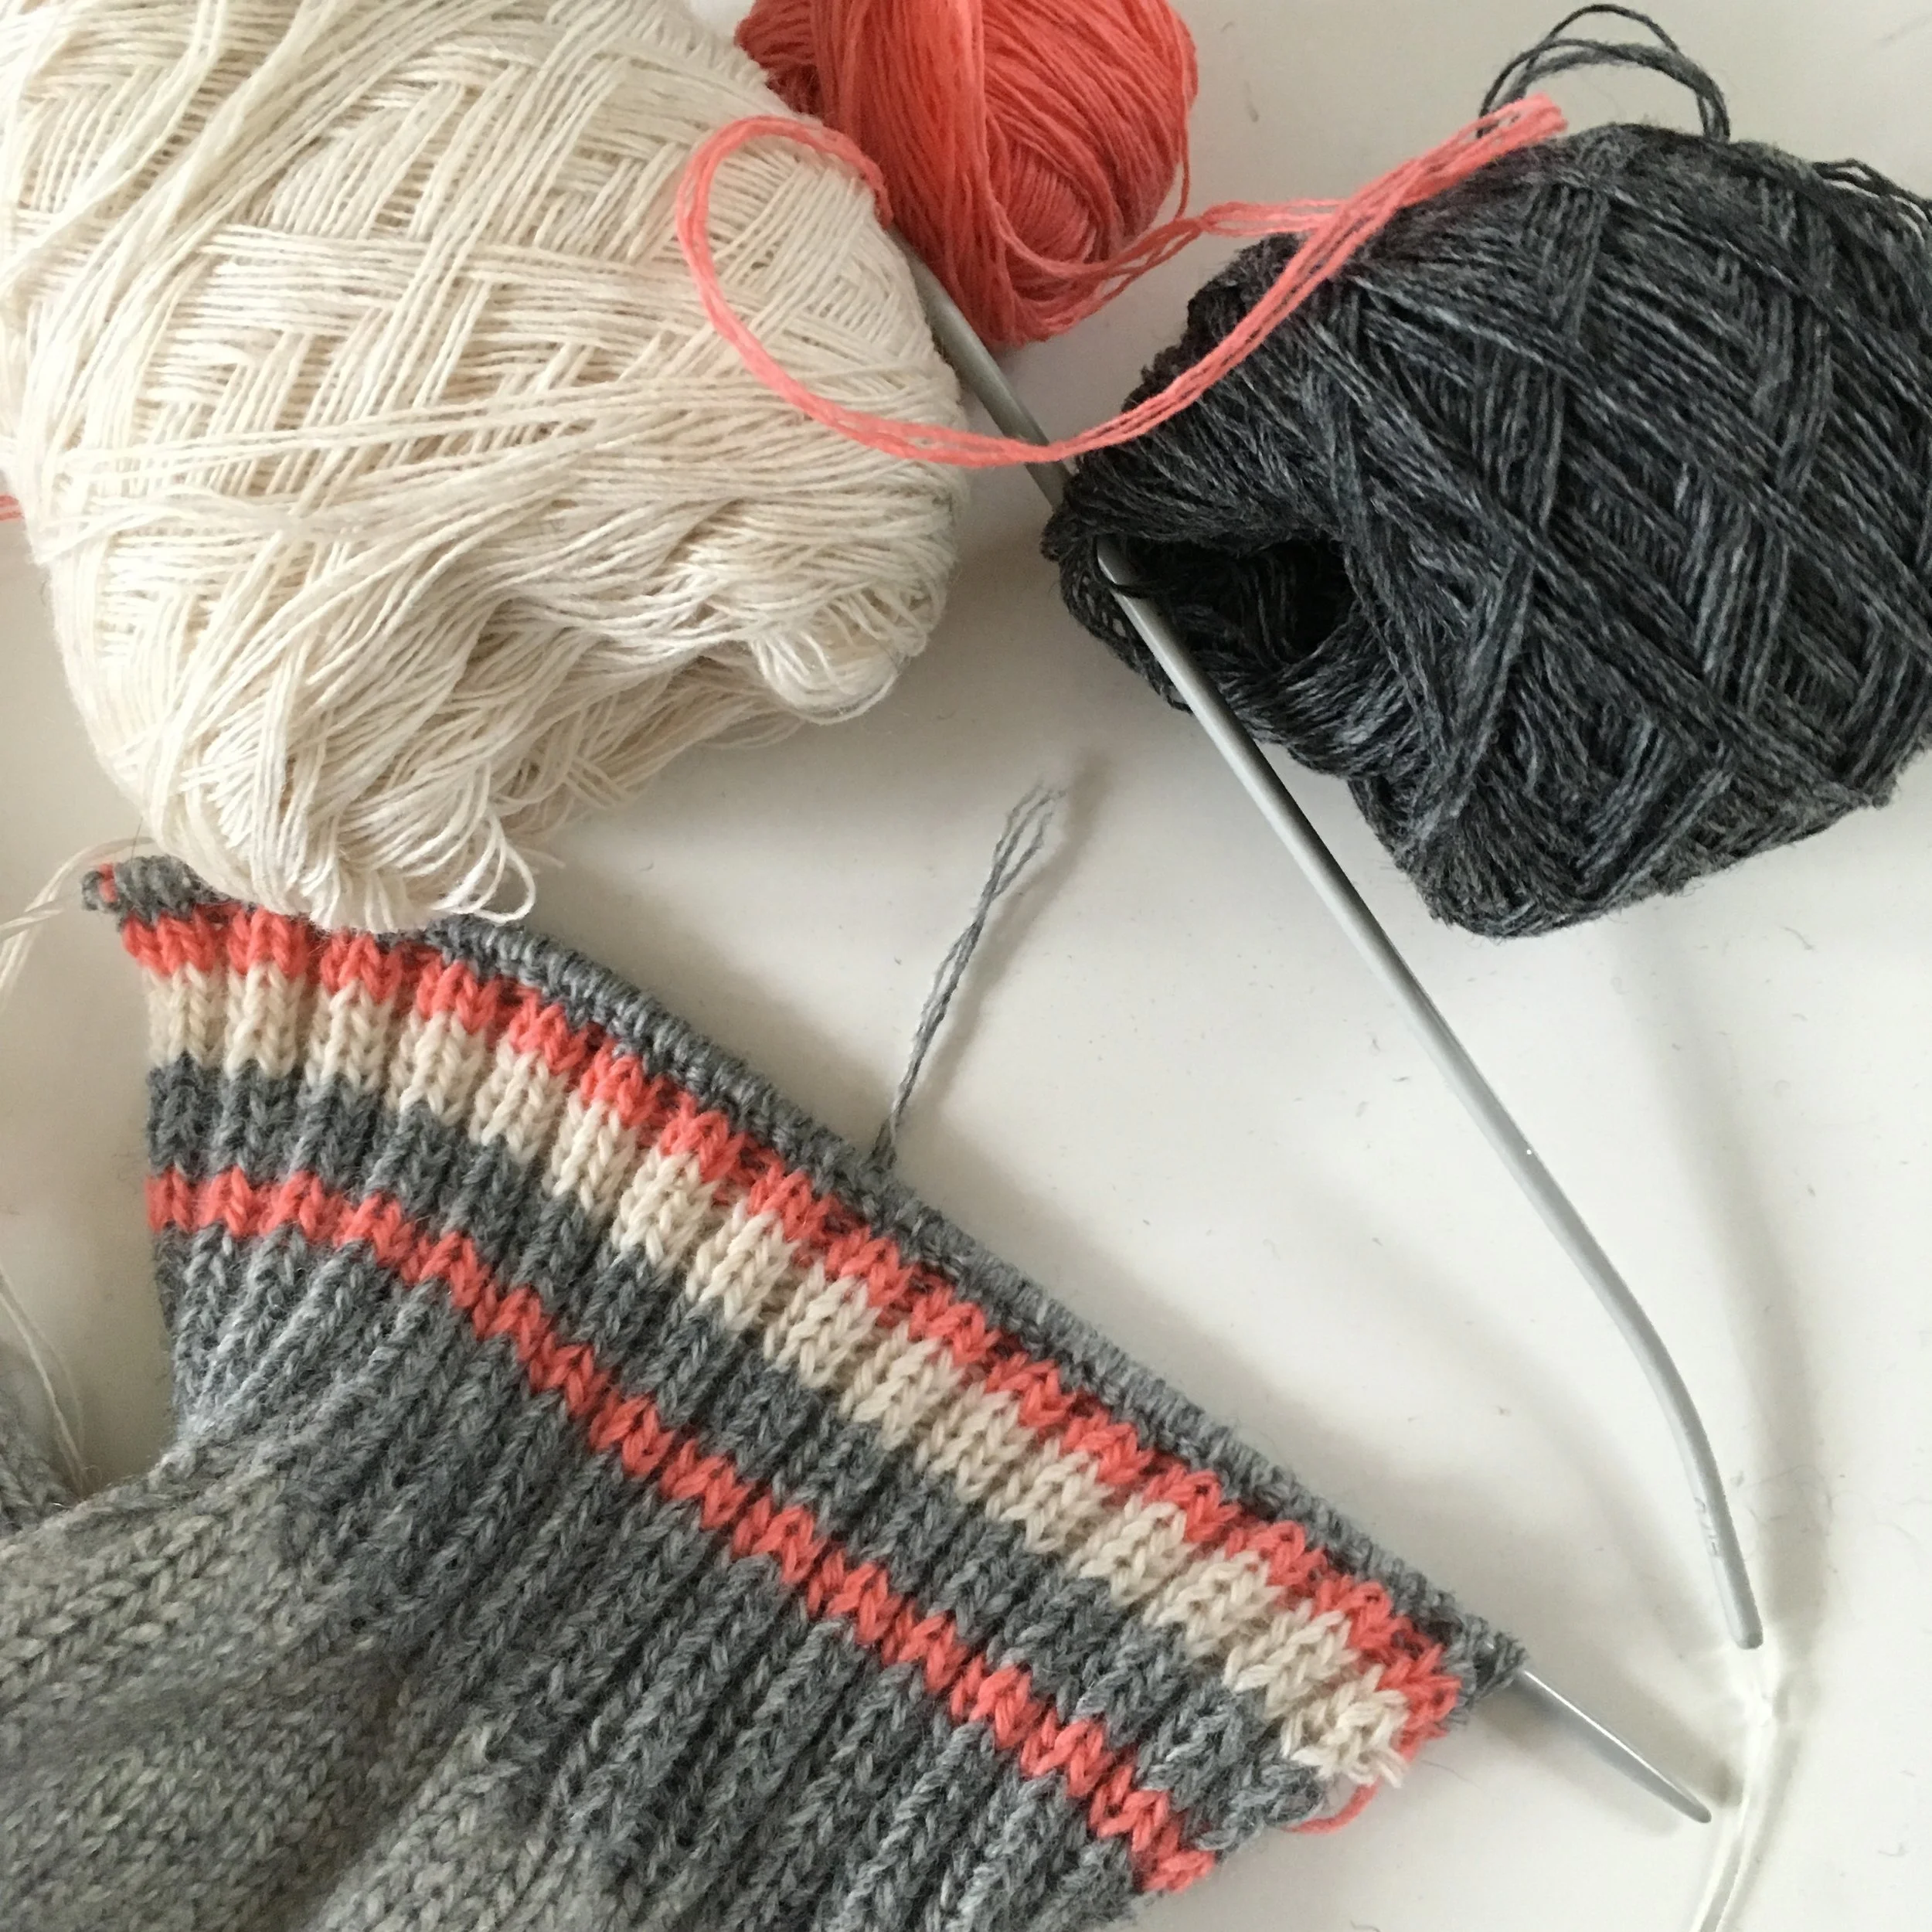
I decided to re-knit the cuffs in colours to match the mends on the elbows.
The other sleeve... knitting some bright stripes!
Done!
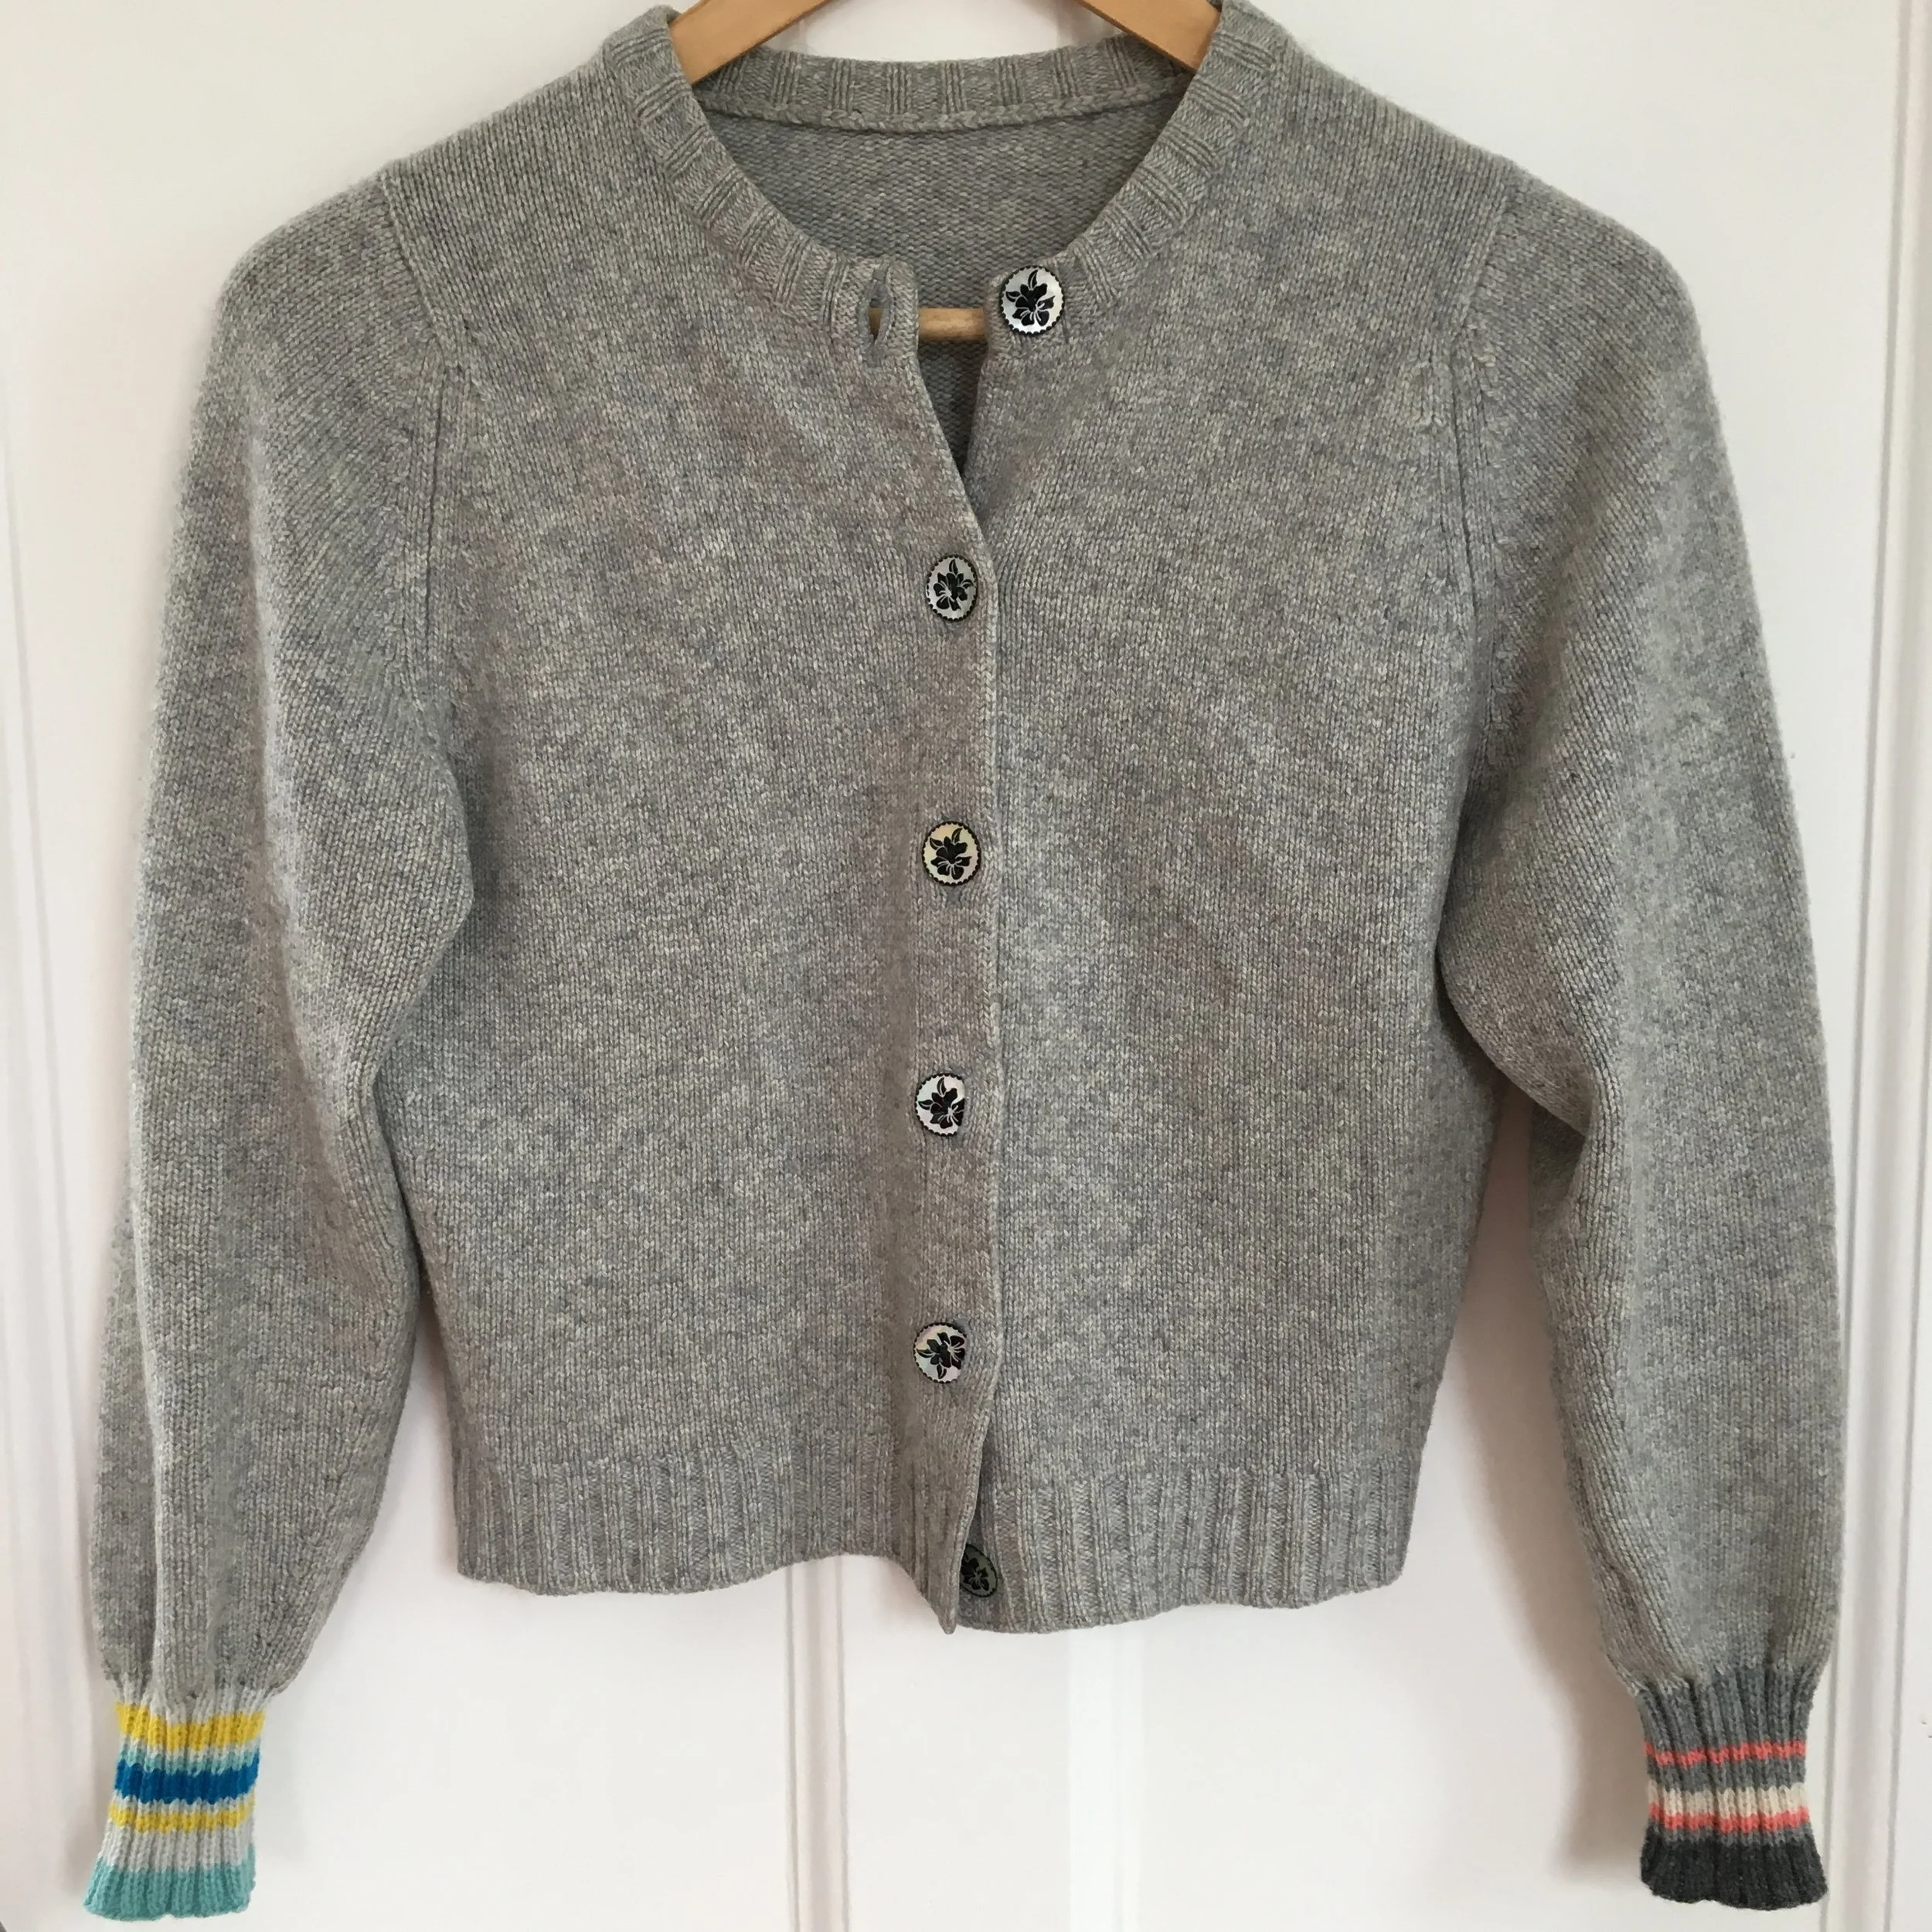
The front, complete with buttons I added a while ago. When I first got this cardigan, it had clearly been well loved, and had odd buttons!
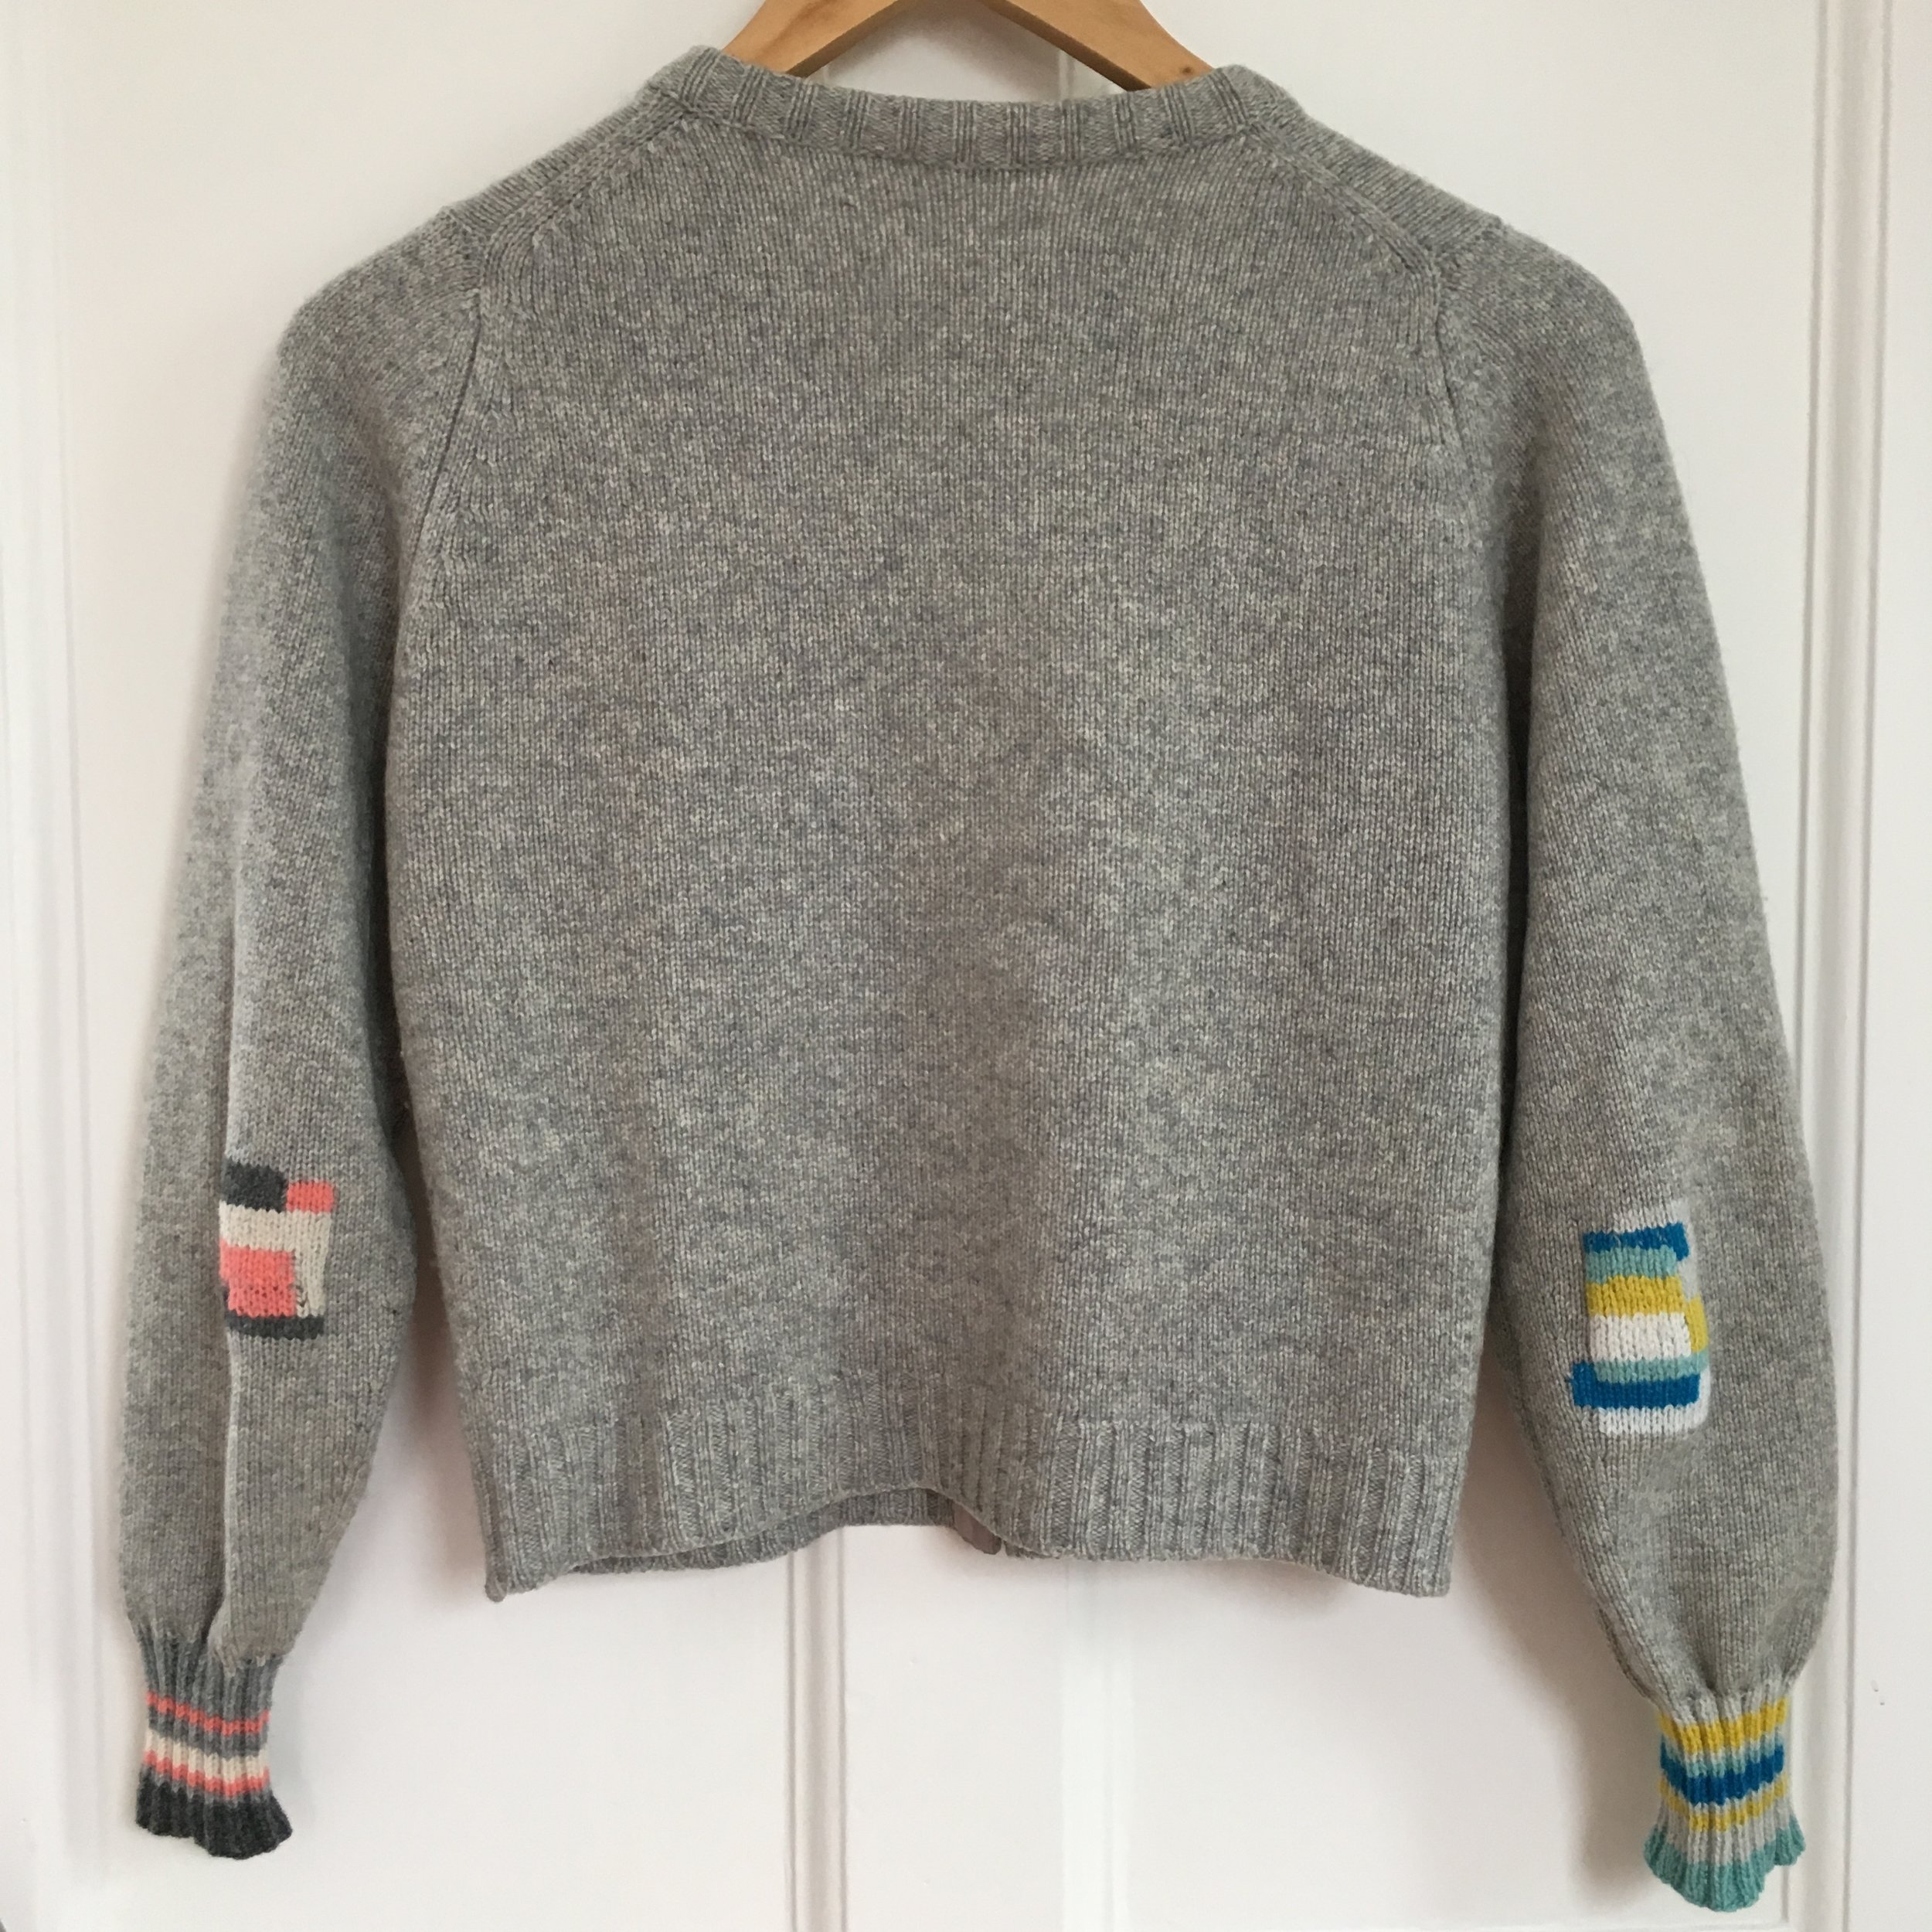
The back, showing my first areas of visible mending!
If you'd like to see some other examples of visible repairs, I've started a Pinterest board with some examples I particularly like.
How do you feel about your clothing changing over time, and would you want to see repairs on your clothes ?
Update : I’m now starting to offer a visible mending service- click here for more details!
If you are interested in coming to a visible mending workshop, please sign up to my newsletter below. If you are unable to make it to my workshops, I’m starting to create mending “How-To” guides for you to use at home.