

Design Process for a New Scarf
I’m so excited to finally have a completely new scarf design to share with you! A lot of work goes into designing a scarf, so I thought I would share my processes:
Inspiration
Design development
Fabric development and sampling
The Making Process
Photo shoot and presentation


Design Inspiration
For these designer scarves, I was inspired by playing with my nephew earlier in the year. We were playing with his building blocks, and he was creating free standing, interesting combinations, and then putting them aside, almost as if they were little artworks, and I loved it! And I started to think about what a fun scarf design idea that could be, playing with blocks of colour.

A small fort I built around my nephew- a dreadful photo of me, but the only one I have of his building blocks, as I try not to get my phone out much around him. I also make him jumpers…!
One of the great things about working with the mill in Hawick, is that I now have more design options, as their digital knitting machines can do so much more than I can on my hand powered one. So I wanted to make the most of that with this new design.
Fabric Design Process
I start most scarf designs with ideas in my head, and I go and try then out on the knitting machine, so I took the idea of blocks, and without planning anything out first, started a fabric on my knitting machine.
The technique I used is called intarsia- it’s very time consuming, and I soon realised I needed to plan my blocks of knitting a little bit more, so after the first sample, I started developing ideas on paper, altering scale and placement of my pattens, and trying more random and planned patterns.
I the ended up combining both, to create small areas of interest on the larger blocks.


Scarf Development Process
Part of the development process for me is trying to imagine how the design will look on a full scarf. As intarsia takes so much time, I tried to do that with smaller pieces of fabric- I knitted it to the width I wanted, just not the length, and tried combining slightly different ideas to see what they might be like.


Doing intarsia on my domestic knitting machine in the studio means there is a clear front and back, so when I handed over my design to the mill, I wanted to try and change that, and add some texture to it all. We tried creating a scarf with blocks of colour and texture, but sadly this still created a very clear front and back and took so long to finish (intarsia involves a lot of sewing in ends after the knitting) that we scrapped that scarf design idea.
Instead, we discussed how we could improve it, and decided on a double-sided intarsia scarf, so that both sides would be exactly the same. Due to it’s double-sided pattern, you’ll never have to worry about how you put it on, as whichever side is showing will look like the front!

The first sample from the mill, adding texture to my design.

The back- just a glimpse of what it’s really like!

The first textured sample alongside the first double sided sample, not yet scaled up.

The first finished double sided scarf sample, with new Iona gloves to match.
The mill did a small trial fabric for me to see, and then they mocked up the colour options I wanted to try. Once I was happy, they knitted up a sample of each scarf, and we’ve gone from there!

Mocks of different colourways. The pattern has been distorted by the knitwear programming software .
The Making Process
Even on the digital knitting machines, intarsia takes time. The bit of the process that is particularly time consuming is finishing all the ends of yarn. Each block of colour has two ends or threads to deal with, as with intarsia each block of colour has its own cone of yarn (so if you see two blocks of yellow in a line, there will have been two cones of yellow yarn used at that point). You can see from the photos of the scarves just knitted below, just how many threads there are along the edge of the scarves. You might also notice what look almost like running stitches in the larger blocks of colour- these are the yarns for the other blocks, that have to be knitted in across the big blocks for technical reasons I won’t bore you with- but they all have to be unpicked later! So these scarves are a real labour of love!

The digital knitting machine all the scarves are knitted on.
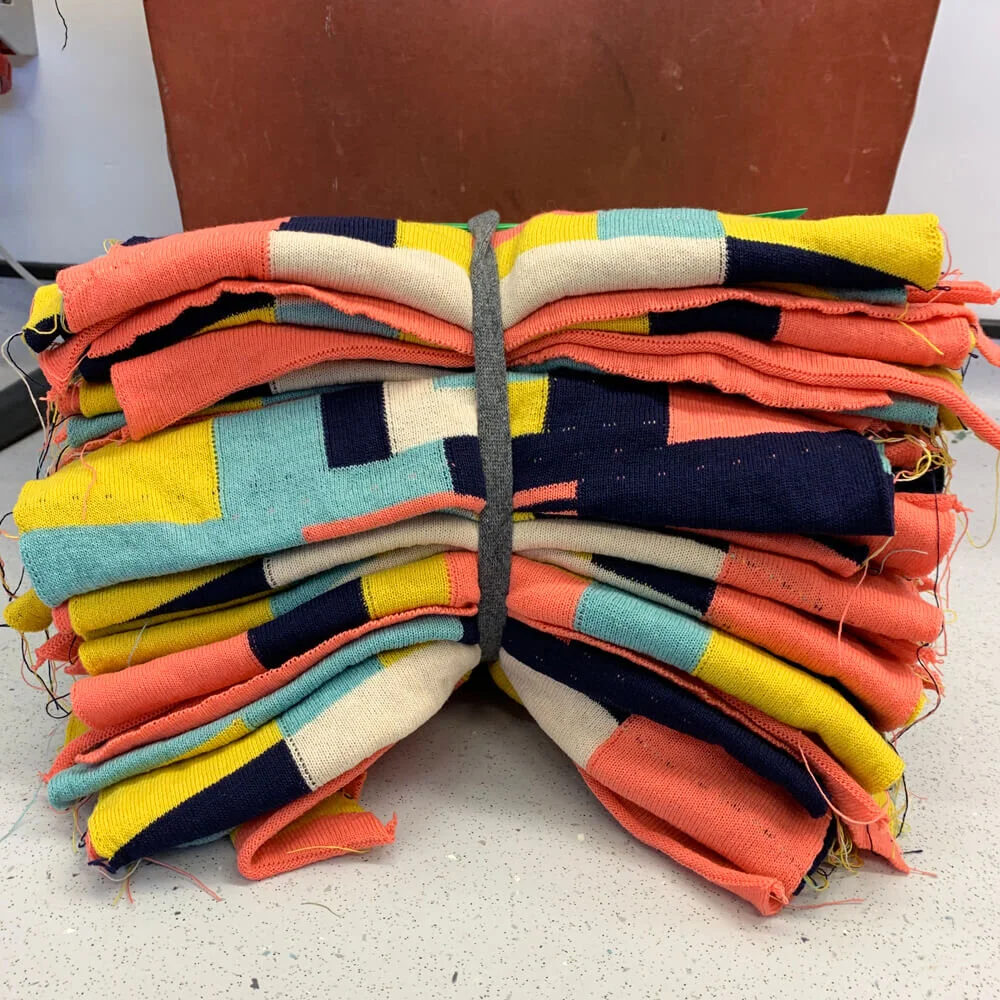

The knitted scarves, before any finishing happens to them.
Photo Shoot
Part of the process for any new scarf design is taking photos of the final pieces so I can show you all! I actually get really stressed about my photoshoots, and working out what I want, how I want them to look etc. Each one is a learning curve, and I come away thinking “if only I’d thought of… “. I’m lucky to work with Rose and Julien, a local duo who are great to bounce ideas off, and work so incredibly hard to help me get what I want.
For these scarves, I wanted some photos outside, as well as some studio shots. I asked Elizabeth Martin to lend me some of her fabulous coats, and had earrings lent to me by Caroline Finlay and Beth Lamont to add some extra colour. These are all fantastic Scottish designers, and what better way to showcase my scarves, than to style them with other Scottish designer’s work?
I chose the Melrose suspension bridge as our outdoor location- the patterns of the railings, the cables themselves, as well as the archway at each end are really beautiful as well as being a local landmark, so it was great to use somewhere in the borders to take the photos. The locals were very tolerant of us, although we did have a few moments of worry when enthusiastic wet dogs rushed up to us!
We also did a smaller shoot using my beautiful mum as the model for some age variety.

I tried to take a photo through Julien’s photo…

Julien Really goes the extra mile sometimes!


This has been a work in progress for most of this year- that’s how long it can take to go from an idea in my head to the finished product. I hope you enjoy the results!
If you’d like to come and see these scarves in person, and try them on, I’ll be at a variety of events this Autumn/Winter, from London to Aberdeen, so please have a look at my events page here to see where would suit you- and please tell your friends.